Quantcast
Channel: KNIME news, usage, and development
Viewing all 561 articles
Browse latest View live

How to pick the best approach to data science

$
0
0
How to pick the best approach to data sciencebertholdMon, 07/22/2019 - 10:00

The data science dilemma: Automation, APIs, or custom data science?

As companies place an increasing premium on data science, there is some debate about which approach is best to adopt — and there is no straight up, one-size-fits-all answer. It really depends on your organization’s needs and what you hope to accomplish.

There are three main approaches that have been discussed over the past couple of years; it’s worth taking a look at the merits and limitations of each as well as the human element involved. After all, knowing the capabilities of your team and who you’re attempting to serve with data science influences heavily how to implement it.

The more researchers (people capable of inventing new algorithms), coders (those who can actually write the underlying code to make data science “real”), and classic data scientists (folks who blend data, tools, and expertise) an organization has, the more options there are available to you. 

There are also solutions designed for those that might have only a casual user group that probably couldn’t create an analytical workflow from scratch but that could use something as a template to get started. And sometimes organizations conduct data science only by and for business users who don’t want or need to build anything — or understand the data science behind it; they only want to solve or improve a real business case, often as part of an existing application.

Given your people resources and needs, let’s dive into the approaches and which may best suit your business.

Shrink-wrapped data science for business users

About a year and a half ago, we saw a push by companies attempting to automate data science. This movement was designed for business users and basically said organizations didn’t need any of the other groups; an automated solution would just magically tell them what they wanted to know. If you’re a business user, this sounds wonderful, right?

It’s not quite so simple though. First, you need to hope that whoever the black box vendor is, that the one who sells the system will keep up with the latest and greatest technology. This needs to be done so that the system grows with you and continues to provide the insights you want to know.

Second, and most importantly, your data have to be in shape to run them through that system. Surprising as it may sound, this is still one of the biggest hurdles to modern data science. We’ve been talking about the challenge of data wrangling for the past decade and still haven’t solved it. Unless you have very standard types of setups, the data won’t be ready or able to be run through the system without extra effort.

Suppose your data are in great shape though, and you can find an automation solution that is close enough to what you want to know. You don’t need cutting-edge performance, and what you are interested in learning about is not core to your business’ bottom line; it’s ok if the results are a few percent off the optimum. In this case, automated solutions can be fantastic — as long as you recognize the limitations.

Preconfigured, trained models that tackle basic problems

Data science APIs refer to the practice of using preconfigured, trained models. Data science APIs work extremely well for predefined, standard problems; think about things like speech or image classification. 

If you are interested in classifying images, for example, you shouldn’t spend the time and energy to collect millions of images to build your own classification system. That’s something you should willingly purchase as a service — you can easily rely on a company that does a great job of it, like Amazon or Google. Just be sure that the data format required by the API is supported; otherwise, things can get a bit complicated.

You also need to gain clarity that the model does what you actually need it to do; that is, it was trained on the right type of data with the right goal in mind. If this is not the case, you might get results that are just similar to what you thought you wanted. This may or may not be sufficient for the problem at hand, of course. A model trained on European animals will still recognize cats and dogs in Australia. It may struggle with a koala, though.

Additionally, if you’re using APIs in production, you probably want to be sure the results are stable and reproducible. It would be terrible if all of a sudden one of your — so far best — customers was classified as “The Worst Ever” just because the technology underneath changed. With external data science APIs, unfortunately, you often can’t count on continuous, backwards-compatible upgrades.

Customization and all that comes with It

Custom data science basically flips all of this around. In this approach, systems can leverage the really messy data; new fields, sources, and types can be accessed to give you what you want. 

This is particularly helpful if you work in an environment where every other month someone says, “We could probably improve performance here if we add in this type of analysis or use this other type of data.” Custom data science is adaptable to ongoing change.

An additional benefit of custom data science is that you can pull from different data sources — legacy systems, on-premises, in the cloud, etc. You don’t have to sit around waiting for some mythical data warehouse to show up and bring all of your data together in a nice, clean way. It can be a true mix.

One thing worth noting, however, which is often ignored in the early part of a project, is that you ultimately want to operationalize it; you want to put this stuff into production. It’s a terrible feeling to run something in a test environment and say, “I trained this model — it’s validated in my test data. This all looks good,” and then suddenly, it has to be recoded and handed off to another department to put into production. Instead, you should be able to use the same environment to productionize it immediately.

And for custom data science to work well, you need in-house domain AND data science expertise (or at least great partners). You need people who understand the problem you are trying to solve very well, who can work with data scientists, and put the model to work. After all, you don’t want data scientists to create an application and then never refine or learn from it. These teams must be able to collaborate consistently to get bleeding-edge performance.

You also need reliable, reproducible results. This is another point that is often ignored, but in production, you want to be sure that what you did yesterday is at least related to what you do tomorrow. Similarly, you want backwards compatibility, so if you try to use what you built a year or two ago, you still can. 

Over time, packages may change, and without backwards compatibility, you can’t run the original program any more (or worse, it quietly produces totally different results). Also, to adjust it to solve a similar problem based on the original blueprint is almost impossible. Custom data science allows you to do this and much more.

Putting it all together

In preparing to make data science decisions for your organization, there is undoubtedly a lot to consider. Just try to remember these basic guidelines:

  • Automation helps to optimize the selection of models. If you don’t want to do it all yourself, this can save a lot of time.
  • Data science APIs help you reuse what’s proven. It is not necessary to build an image or speech classification system — there are services out there to help. Use and incorporate them as part of your analytical routine.
  • Custom data science provides the power of the mix. It is the most flexible and powerful approach, but you need to be able to incorporate at least some of your in-house expertise. At the same time, it enables you to automate the boring stuff and allows interaction to focus on the most complex and nuanced.

As is often the case with data science, it’s about choice. Automation or prepackaged data science is suitable for better defined problems where standard performance is sufficient. 

But if getting the best results is business-critical to you and gives you that competitive edge, you need to invest in custom data science. There is no free lunch here. Cutting-edge data science requires cutting-edge data scientist expertise applied to your data.

As first published in The Next Web.

Useful Links

  • The article Principles of Guided Analytics, also by Michael Berthold, looks at the benefits of enabling an interactive exchange between your in-house domain expert and the data scientist.
  • Phil Winter's post KNIME Meets KNIME - Will They Blend? tests whether KNIME workflows really are backwards compatible.
  • Interested in updating to KNIME Analytics Platform 4.0? Tune in to the What's New webinar on July 25. More infos here.

Multi-factor Auth for KNIME Server

$
0
0
Multi-factor Auth for KNIME ServeradminMon, 07/29/2019 - 10:00

Using Okta to Modernize LDAP

Author: James Weakley

We’d like to introduce James Weakley, a Data Architect at nib health funds, who recently wrote a short blog post on the topic of KNIME Server and Okta. James has given us permission to republish it here. But first a few words about James.

Multiformat Auth for KNIME

James' role at nib is to support data analytics practice from a technology perspective. This involves guidance on how to best leverage cloud products for performance elasticity, as well as operationalizing through integration with other business applications.

nib’s BI analysts seek to understand and predict customer behavior, and recently started using KNIME Server to assist with this, and so that they could better leverage the Snowflake data warehouse in a team environment.

As James rightly points out in his post below, KNIME Server Large supports LDAP out of the box (full documentation is available here); it’s also possible to set up Kerberos Single sign-on as well, but the really nice thing about the Okta setup, is that two-factor auth comes almost for free! The other very convenient aspect is that the whole KNIME Server deployment is handled on AWS. In case that is something that interests you, there is plenty more information here. And finally, as you can see in the ‘shout outs’ at the end of his article, it was great to see that our trusted partners at Forest Grove Technology were able to help James along the way.

"Okta have built a successful company on making authentication easy, and recently their managed LDAP interface became generally available to all customers.

Multifactor Auth for KNIME
Fig. 1 Okta's managed LDAP interface

It was great timing for me, as I was helping out our Business Intelligence team deploying KNIME Server to our AWS environment. KNIME Server is the commercial complement to the open source KNIME Analytics Platform. In line with the analytics software industry’s undying love of Java, it runs on Apache TomEE.

LDAP is a supported method of authentication for KNIME Server. Let’s face it, 99% of the time in an enterprise scenario, this involves pointing it at a Microsoft Active Directory domain controller.

An Okta customer can instead point it at their Okta LDAP interface. For example, if your Okta domain is your_org.okta.com, in your server.xml file you would define a Realm like this:

The connection password is passed in as an environment variable using the CATALINA_OPTS section of setenv.sh. In our case, we retrieve this value from AWS Systems Manager Agent (AWS SSM) at boot time.

Importantly, I extended the LDAP connection timeout to 60 seconds, from the default of 5 seconds. This is because in the Multi Factor Auth(MFA) scenario, Okta waits for the MFA acknowledgement by the user, before responding to the LDAP request.

Finally, you have to tell KNIME which LDAP group the KNIME admins belong to. This is done in the knime-server.config file under the workflow repository directory.

com.knime.server.server_admin_groups=KNIME Administrators

Here I am at the login screen:

Multifactor Auth for KNIME
Fig. 2 KNIME WebPortal login screen

When I click “Login”, my iPhone immediately buzzes me to approve the login in the Okta Verify app, while the browser waits:

Multifactor Auth for KNIME
Fig. 3 Approving my login in the Okta Verify app

Once I click Approve, I'm in!

Multifactor Auth for KNIME
Fig. 4 KNIME WebPortal in action

Shout-outs to Luke Gibson (nib’s resident Okta guru) and Forest Grove Technology for helping out along the way with this deployment."

As first published on Medium

Useful links

Check out the first four videos in a series on KNIME Server, just released on Friday!


Declutter - four tips for an efficient, fast workflow

$
0
0
Declutter - four tips for an efficient, fast workflowadminMon, 09/02/2019 - 10:00

Recently on social media we asked you for tips on tidying up and improving workflows. Our aim was to find out how you declutter to make your workflows not just superficially neater, but faster, more efficient, and smaller: ultimately an elegant masterpiece! Check out the original posts on LinkedIn and Twitter.

Declutter - Four Tips for an Efficient, Fast Workflow
Fig. 1 From confusion to clarity - decluttering your workflow

In this collection of your feedback, we isolate and discuss a few areas worthy of investigation in the post-development phase of your workflow. Inspired by Marie Kondo’s approach to tackling things category by category, this article is tidily organized into the following sections:

  1. From confusion to clarity: Improve the transparency of your workflow.
  2. Reorganize your workflow: Imagine your ideal workflow
  3. Efficient enough? Increase the efficiency of your workflow
  4. Ask yourself if there is another technique: Insert a dedicated node/Inquire among your peers

1. From Confusion to Clarity

As you build your workflow, the twists and turns that it takes can produce quite some levels of confusion. We all build messy workflows because we are assigned a task and the specs are either not known at the beginning or they change on the way. This is normal. At the end - in the post-processing phase - we need to look back at the mess we have potentially made and reorganize it in a more efficient and structured manner, putting logical blocks into encapsulated functions, and adding documentation.

1.1 Document what happens inside your workflow

You can document these blocks and individual nodes by providing annotation notes and comments. Use the Annotation Note feature to mark sections of your workflow and describe what is being done in this part of the workflow in the note. And use the Comment function to note down what individual nodes are doing. This video describes “Documenting Your Workflow”.

If you share workflows or results with your colleagues, they can then easily understand the individual steps and provide feedback. And if you share your workflow on the KNIME Hub, this information makes your workflow easier to understand for the community.

Backward compatibility across all versions of KNIME Analytics Platform ensures that the work you've done today can be safely used and deployed in the future. So, if you’re returning to a workflow after a longer period of time, it’s much easier to see at a glance what each part of the workflow does if it is well documented.

1.2 Document your workflow's metadata

So much for commenting the single pieces inside a workflow. What about explaining what it does? Each workflow has metadata, which are not only useful when you open the workflow in KNIME Analytics Platform, but also when you search on the KNIME Hub: If you search for “Guided Analytics”, for example, you’ll see a description of the workflow and the tags associated with each workflow result. The tags are of particular importance for a successful search of your workflow. If you plan to share a workflow on the KNIME Hub, choose the tags carefully!

Editing workflow metadata

It’s very easy to edit these metadata with the Description view, which you can access after you have selected a workflow in the KNIME Explorer.

Declutter - Four Tips for an Efficient, Fast Workflow
Fig. 2 Editing a workflow's metadata by selecting Description from the View menu and then selecting the Edit function

Below, in Fig. 3 you can see where your workflow metadata will be shown when the workflow is uploaded to KNIME Hub.

Declutter - Four Tips for an Efficient, Fast Workflow
Fig. 3 A workflow's page on the KNIME Hub - see here where the workflow's metadata is visible to others

2. Reorganize Your Workflow

Look at your workflow and then imagine how it should be ideally. With fresh eyes, it’s often easier to see how a complex process could be simplified and better organized to be more efficient. Check whether any of the tasks inside the workflow are autonomous and could be encapsulated and reused. Can the workflow be stripped of any redundant operations to be made leaner? Can the workflow be reorganized into layers of operations to aid transparency and understanding? Now let’s look at how to tackle this.

2.1 Break up your workflow into metanodes & components

Any complex task can be broken into smaller, simpler pieces. As can your workflow. John Carr suggests to always look at your complex workflow from a distance at the end of the development phase and then restructure it into simpler smaller sub-flows.

As for all software development projects:

  • Step 1: Identify self-contained logical blocks of nodes. The advantage of this is that you find out which operations are redundant and can be removed or simplified. Which, of course, makes the whole workflow leaner and faster.
  • Step 2: Encapsulate these self-contained blocks into either a metanode or a component, which can then be reused for the same task in other workflows; not only for yourself but for colleagues or the Community too; grouping into smaller, self-contained, leaner and non-redundant logical blocks improves the efficiency and understanding of your workflow at first glance.

On this same note, Joshua Symons points out that “using a metanode is not just hiding the mess. A well-formed metanode is reusable across multiple workflows.” He brings up the example of calculating TF * IDF in a text processing workflow or cascading String Manipulation nodes for complex string operations. The whole operation consists of a series of Math Formula or String Manipulation nodes that can be easily grouped into a component.

This brings us to the topic metanode vs. component. What is the difference and how are they used?

Metanode:

Essentially a metanode allows you to organize your workflow better, taking part of a larger workflow and collapsing it into a gray box, making it easier for others to understand what your workflow does as you can structure it more hierarchically.

Component:

A component not only hides the mess but also encapsulates the whole function in an isolated environment. To paraphrase a famous sentence about Las Vegas: What happens in the component stays in the component. All flow variables created in a component remain inside the component. All graphical views created in the component remain in the component’s view. This makes your workflow not only cleaner on the outside but also on the inside, keeping the inevitable flow variable proliferation under control, for example.

Tip: If you want to let a flow variable in or out of the component, you set the component’s input and output nodes respectively. Cem Kobaner comments “Use flow variables and create generalized metanodes with parameterized node configurations”. He calls this dynamic visual programming.

Sharing components:

A component can also be reused in your own workflows and shared with other users via the KNIME Hub or KNIME Server.

If you want to have the component handy for reuse in your KNIME Explorer, create a shared component by right clicking it and selecting Share... in the menu. After you’ve defined the location where you want to save it, specify the link type. This defines the path type to access the shared component. Similar to a data file, it can be absolute, mountpoint-relative, or workflow-relative. Now, after clicking OK, you can find the shared component in your KNIME Explorer and you can drag and drop the shared component to your workflow editor and use it like any other node.

If you save the shared component in your My-KNIME-Hub, you’ll be able to see, reuse, and share the component via a KNIME Hub page. To open this page, right click the shared component under your My-KNIME-Hub and select Open > In KNIME Hub in the menu. From the KNIME Hub page that opens, you and other users can drag and drop the component to their workflow editors, and also share the short link that accesses this specific KNIME Hub page.

Declutter - Four Tips for an Efficient, Fast Workflow
Fig. 4 Screenshot of part of web page on the KNIME Hub that shows the workflow's short link

Note that the KNIME EXAMPLES Server provides shared components for parameter optimization, complex visualizations, time series analysis, and many other application areas. Find them on this KNIME Hub page and in the “00_Components” category on the EXAMPLES Server.

So how can you best determine which parts of your workflow can be reorganized?

2.2 Checklist to reorganize your workflow

When we asked you for feedback on social media, a lot of people responded with their best practices and tips for improving writing workflows. We grouped your feedback and came up with this checklist for reorganizing workflows:

  1. Ask yourself what the objectives are
  2. Take an iterative approach to writing workflows - always go back and check what you have done
  3. Identify repeating sections of your workflow and then create a template to do that task
  4. Think carefully about whether there is a more efficient way to do what you’re doing
  5. Look for redundant blocks of nodes

3. Efficient Enough?

To write efficient workflows you probably need to check that the nodes you have used really are the best nodes for the job. We’ve grouped together a short list of our nodes and practices and those you sent to us on social media. See if there’s something you might like to try out yourself.

3.1 Don’t repeat operations: Sorter node after Groupby node

Rosaria Silipo commented: “One thing that I have learned the hard way is that you should not use a Sorter node after a Groupby node. In fact the Groupby node already sorts the output data by the values in the selected group columns. So, you see if you add a Sorter node after the GroupBy node you waste time and resources to sort twice the same set of data. Now if the dataset is small this is not a big problem, but if the dataset is big … the slow down in execution can be noticeable."

3.2 Many nodes in cascade vs. multiple expressions in a single node

Sometimes simple math operations or string manipulation operations end up in a long sequence of the corresponding nodes. Is there a way to avoid the cascade of nodes performing math or String Manipulation operations?

“It’s always a good idea to understand how the tools work and what they can do. For example the Column Expressions node allows you to have multiple expressions for multiple columns in a single node, which helps keep things really neat, clean, and simple,” says John Denham.

The Column Expression node lets you append an arbitrary number of columns or modify existing columns using expressions. For each column that’s appended or modified, you can define a separate expression - created by using predefined functions similar to the Math Formula and String Manipulation nodes.There’s also no restriction on the number of lines the expression has and the number of functions it uses. You create your very own. This also increases the workflow’s execution speed for a big bulk of cascading operations.

3.3 In-database processing / SQL Code

Julian Borisov advises - whatever can be done in-database, should be done in-database! For example, SQL code can replace operations implemented via a sequence of nodes.

The example workflow on the KNIME Hub - the In-Database Processing on SQL Server workflow - performs in-database processing on a Microsoft SQL Server. Performing data manipulation operations within a database eliminates the expense of moving large datasets in and out of the analytics platform. Further advantages of in-database processing are parallel processing, scalability, analytic optimization and partitioning, depending on the database we are using. This is particularly true when using a big data platform.

Boost in speed

Performance has been a major focus of the latest release. KNIME Analytics Platform 4.0 and KNIME Server 4.9 use system resources in the form of memory, CPU cores, and disk space much more liberally and sensibly. Specifically, they:

  • attempt to hold recently used tables in-memory when possible
  • use advanced file compression algorithms for cases when tables can’t be held in-memory
  • parallelize most of a node’s data handling workload
  • use an updated garbage collection algorithm that operates concurrently and leads to fewer freezes
  • utilize an updated version of the Parquet columnar table store that leverages nodes accessing only individual columns or rows

As a result, you should notice considerable speedups of factors two to ten in your day-to-day workflow execution when working with native KNIME nodes. To make the most of these performance gains, we recommend you provide KNIME with sufficient memory via your knime.ini file. You can do this as follows:

  1. In the KNIME installation directory there is a file called knime.ini (under Linux it might be .knime.ini; for MacOS: right click on KNIME.app, select "Show package contents", go to "/Contents/Eclipse/" and you should find a Knime.ini).
  2. Open the file, find the entry -Xmx1024m, and change it to -Xmx4g or higher (for example).
  3. (Re)start KNIME.

3.4 Measure execution times: Timer node

There will always be execution bottlenecks. So how can we detect them - especially those that waste execution time? A precious ally in the hunt for execution bottlenecks is the Timer Info node. This node measures the execution time of the whole workflow and of each node separately.

There’s a proverb about all roads leading to Rome. Translated to a workflow, there will always be several workflows to get to your final goal but you’ll want to pick the shortest and fastest one. In Misha’s example workflow in Fig. 5, he compares different implementations for the same goal - column expressions, string manipulation with header extraction and string manipulation with column renaming - and uses the Timer Info node to see which implementation is the fastest.

Declutter - Four Tips for an Efficient, Fast Workflow
Fig. 5 This workflow uses the Timer Info node to measure which implementation is the fastest

In the next example, Performance and Scalability Test, Iris and Phil investigated performance measures on workflows. They not only compare the speed of the different workflows but also how much memory were used from the different workflows. For this setup they  compare different parameters and data sizes. The final metanode “Measure Workflow Resources and Times” is used to collect the maximum used memory and the start parameters of this instantiation of KNIME Analytics Platform. Also note the use of the Timer Info node. It tells you how longs which node and even which components take to execute. Just execute it after executing the previous nodes to find bottlenecks in execution time.

Declutter - four tips for a faster more efficient workflow
Fig. 6 The Performance and Scalability Test workflow, which investigates performance measures on workflows

4. Ask yourself if there’s a better technique. Is there a dedicated node?

KNIME Analytics Platform works on data tables all together, not on the single data rows. Dedicated functions working on a whole data table are available. You don’t need to reprogram it from the start. This makes the usage of loops less necessary. 

“When I use a loop, I always have in the back of my mind this idea that somewhere in the Node Repository there is a node that does exactly what I am trying to achieve with the loop in a much more complicated way.” says Rosaria Silipo (KNIME).

For example, if you are currently using a loop, for example to remove numeric outliers in different columns you can do the same thing with a dedicated node - the Numeric Outliers node. It removes values that lie outside the upper and lower whiskers of a box plot. If you do the same process with a loop, you would need quite a lot of data manipulation nodes inside to do so: Auto-Binner, GroupBy, String Manipulation, Math Formula, Rule-based Row Filter, and even more. The Numeric Outliers node can replace the whole loop, since it can remove outliers from multiple numeric columns at the same time. 

But sometimes you cannot avoid using a loop. In this case, you need to choose the most suitable loop construct for your problem.

Chris Baddeley says: “Nesting of transformations within string manipulation can reduce concurrent string manipulation nodes and looping over a process vs. running parallel processes can reduce clutter”.

There are lots of loops to choose from: Counting Loop Start, Chunk Loop Start, Generic Loop Start, …..”Armin Grudd has written a blog post about them all! Look here for how to find the right loop for your purposes - on statinfer. Or check out our short video series on Looping in KNIME

Note: Remember that loops over nodes slow down the workflow execution speed.

4.1 Inquire among the community

If you want to find out if there is a more efficient way of ‘doing what you’re doing’, it can be a good idea to ask a colleague, or the KNIME Community.

  • The KNIME Hub is a useful resource to see if you can find nodes that are maybe more efficient than the ones you’re already using. You can read more about how to use the hub on our About KNIME Hub pages
  • Check on the KNIME Forum to see if other people know different KNIME tricks for performing a particular data manipulation.

By searching the Hub and talking to the Community on the KNIME Forum, you might find out about nodes with functionality you hadn’t heard of before.

Summing up:

To summarize how to tidy and improve your workflow:

  • Good documentation and metadata improves your workflow’s readability
  • Metanodes are great for tidying away sections of your workflow that distract visually from the focus of the workflow and for isolating logically self-contained parts.
  • Components are excellent containers for repeatable functionality in your workflow, for avoiding the flow var proliferation, for creating new nodes with a configuration dialog, and can also be shared with your team and the KNIME Community
  • The KNIME Hub and KNIME Forum are the places to go to look for other nodes that might be able to perform the specific task more efficiently and also useful platforms to share your workflows and ask the Community for feedback

Thank you to everyone who responded to our messy workflow campaign on social media!

And we will be watching out for the Declutter node as suggested by Mohammed AyubI would imagine, one day, we will have just one button called "declutter" which runs some AI stuff on the dependency graph of the connected/unconnected nodes and automatically groups/creates metanodes in the left --> right order of "Data Reading Nodes", "Data Manipulation Nodes", "Data Modelling Nodes", "Data Writing/Output Nodes" etc etc.

Accessing the HELM Monomer Library with KNIME

$
0
0
Accessing the HELM Monomer Library with KNIMElongokaMon, 09/09/2019 - 10:00

Author: Kenneth Longo

The cheminformatics world is replete with software tools and file formats for the design, manipulation and management of small molecules and libraries thereof. Those tools and formats are often specialized in analyzing small molecules of ~500 daltons, give or take a few, or those molecules that can reasonably be drawn and understood using classic ball-and-stick or molecular coordinate frameworks. Perhaps not coincidentally, this neatly envelops the needs of small molecule drug discovery, where it is not uncommon to find both public and privately-held repositories of hundreds of thousands (to millions) of such molecules, for use in molecular or phenotypic screening assays. The small size and elemental simplicity of these molecules has resulted in a variety of storage file formats (e.g., mol, SMILES, sdf, etc) and many supporting software packages (e.g., RDkit, CDK, ChemAxon, etc) for visualization and manipulation that support them. KNIME Analytics Platform provides easy access to those file formats and software packages.

Challenged by the advent of biologic therapeutics

However, the advent of ‘biologic’ therapeutics, such as antibodies and oligonucleotides, created a new problem: how can much larger molecules be represented and stored, when a molecular drawing of precise coordinates may be either prohibitively large and difficult to assemble, or when the molecular coordinates themselves cannot be known with full precision?

Enter HELM

Within the last few years, an open-source notation known as the Hierarchical Editing Language for Macromolecules, or HELM, has emerged as a useful solution to this dilemma. The simple yet powerful logic of HELM is that small monomers, represented and visualized using the *.mol format, can act as building blocks for larger molecules. Additionally, these monomers are encoded interchangeably by an abbreviated syntax, so that large and complex molecules can be written and stored as relatively short strings.

HELM was initially conceived as a project within Pfizer1 . It has been developed further by members of the Pistoia Alliance, whose stated goal is pre-competitive collaboration leading to innovation for R&D2. Recently and for the first time, a curated library of HELM monomers was made available on the website monomer.org3. This library can be a useful starting point for users looking to develop their own internal monomer sets.

This blog post will demonstrate how the KNIME Analytics Platform can be used to:

  1. Access and visualize monomers from the online HELM monomer library
  2. Provide basic statistics on library composition
  3. Perform Guided Analytics for substructure searching within the library

In each scenario, we introduce the concept of components for packaging the final visual layouts - as a precursor for developing interactive Webportal views.

Accessing the HELM Monomer LIbrary with KNIME
Fig. 1 The workflow to access the online HELM monomer library with KNIME

Accessing the HELM monomer library through a REST API

Key points:
  • Use ‘GET’ node to access monomer library REST API
  • Alternative inputs to ‘GET’ node: column URI or manual URL entry
  • Returns: JSON-formatted column

The first step in the workflow is to retrieve the HELM monomer library, which is stored as a JSON string, from the website monomer.org4. This is achieved by directing the ‘GET’ node to the library URL; the retrieved content type is automatically converted to the JSON column format.

Two alternatives for performing this action are provided:

  1. Manual entry of the URL into the node UI field, which is sufficient for single entry jobs, or
  2. Included as an URI-formatted column from an incoming table, if the goal is to cycle through multiple URLs
Accessing the HELM Monomer Library with KNIME
Fig. 2 Two methods for retrieving HELM monomer JSON using the GET node

Extracting and cleaning data from the JSON-formatted library

Key points:
  • Working with JSON-type data: Using the ‘JSON Path’, ‘Ungroup’ and ‘JSON to Table’ nodes.
  • Library data understanding & clean-up needed at this step: spotted several incomplete R3 fields; these needed to be re-constructed for completeness.
  • Message on art of approach: There can be several paths to the same goal

This HELM library contains 580 monomers, each with up to three R-groups that describe the conjugate chemistry necessary for macromolecule assembly. The single JSON is ‘broken’ into the 580 rows, each containing a single monomer JSON string by using sequentially the ‘JSON Path’ and ‘Ungroup’ nodes. Subsequently, the ‘JSON to Table’ node extracts all fields from each JSON row, and composites them into a single table of dimensions 580 x 23; redundant fields are given unique column names automatically.
The goal of this section of the workflow is to organize key metadata for each monomer (molecule name, mol structure file, R-group definitions, etc.), and remove ancillary or redundant information. KNIME facilitates data understanding by providing output views for each node, so that the data can be checked (and corrected) for completeness, errors, etc.

Accessing the HELM Monomer Library with KNIME
Fig. 3 Parsing and cleaning JSON data

Generating library statistics and visual representations

Key points:

Once the library has been organized in a table structure, computing statistics and creating visualizations is quick work. In this example, simple aggregate count statistics and preparation on the MonomerType and PolymerType fields were calculated within a collapsed metanode ‘aggregate & prep’, and visualized with several JS View nodes within a component‘donut & sunburst views’ (Figure 4).

Accessing HELM Monomer Library with KNIME
Fig. 4 Performing library aggregate statistics and composite visualizations

Combining JS nodes in a component allows for quickly compositing dynamic, interactive graphics as HTML; this can be viewed as a local output window or, when supplemented by KNIME Server, within the KNIME WebPortal (Figure 5).

Accessing the HELM Monomer Library with KNIME
Fig. 5 The component (left) containing JS Pie/Donut and Sunburst elements (left), which each visualize different library statistics within HTML output (right)

Monomer structure visualization and metadata table or tile display

Key points:

After conversion of the column containing the mol string to an actual MOL-formatted column using the ‘Molecule Type Cast’ node, we are one step closer to visualization of the monomer structures. This workflow demonstrates one particular method for accomplishing this (Figure 6), although there are many possible routes, highlighting the versatility of the KNIME platform and the plethora or cheminformatic-focused node sets at its disposal. At the end of the day, users can and should utilize elements in ways that are fit-for-purpose for the situation at hand.

The powerful ‘Renderer to Image’ node converts the structures from the MOL-format to a PNG image. In the configuration window for this node, we select the PNG image-type, with a 200 x 200 point resolution; this was arrived at after some trial and error (i.e., to establish what ‘looks good’ in the final output, and is not prohibitively large or small). Finally, the structures as images and their related metadata are presented as HTML views coming from component containing either a JS Table view or a JS Tile view (Figure 7). These elements are fully text-searchable, and can be configured further for within-column search, the ability to make and publish selections, etc.

Accessing the HELM Monomer Library with KNIME
Fig. 6 Renderer to Image node for converting MOL files to images with two subsequent composite views
Accessing the HELM Monomer Library with KNIME
Fig. 7 At the top, you can see the Table view and below it, the Tile view of the components as shown in Figure 5

Guided analytics for substructure search and display

Key points:
  • Substructure entry using the ‘Molecule String Input’ node.
  • Substructure search using CDK nodes.
  • Table display of search results.

The last piece of the workflow is an example of Guided Analytics: the user specifies a chemical structure with which to perform a substructure search of the library, which returns ‘hits’ in a component containing a JS Table view (Figure 8).

Accessing the HELM Monomer Library with KNIME
Fig. 8 Substructure search of the monomer library using CDK nodes

The substructure is drawn and entered by the user with the ‘Molecule String Input’ node; in this example, a pentane ring (Figure 9). The actual search is performed by the ‘Substructure Search’ node from the CDK node set; the substructure is passed into this node as a flow variable. Note that the library MOL format first must be translated into CDK format using the ‘Molecule to CDK’ node.

Accessing the HELM Monomer Library with KNIME
Fig. 9 Molecule entry using the 'Molecule String Input' node

The result of the pentane substructure search is a subset of 26 molecules, rendered in searchable table format using a component containing a JS ‘Table View’ node (Figure 10).

Accessing the HELM Monomer Library with KNIME
Fig. 10 Output of the substructure search results as a component with JS Table view

Conclusion

Using KNIME Analytics Platform, the concept of accessing and investigating the HELM monomer library was translated and assembled very quickly. The resulting workflow exemplifies several powerful and easy-to-use features of KNIME Analytics Platform, including:

  • An intuitive user interface with node-type workflow assembly
  • Web REST API support
  • JSON parsing and manipulation functions
  • Integration with cheminformatics tools supporting chemical language translation
  • Guided analytics for user-driven substructure input, searching and viewing
  • The ability to build components that deliver dynamic Javascript-enabled graphs and tables

Perhaps most importantly, this workflow5 and its contents have been made accessible via this blog and the KNIME Hub, a new collaboration and learning space for the KNIME user community. Anyone with an internet connection and KNIME Analytics Platform can download and execute this workflow anew, retrieve the HELM library, perform novel chemical searches of its contents and view the tabulated results.

Users can:

  1. Investigate the workflow to gain some intuition on its function
  2. Expand on its capabilities through their own augmentations of the code
  3. Communicate these ideas back to the community

Furthermore, users with access to KNIME Server have the ability to view the outputs of components in their browser via the KNIME Webportal, highlighting the ability to deliver interactive services to broader communities of users who may not be familiar with coding.

References

1. Zhang et al, 2012, ‘HELM: a hierarchical notation language for complex biomolecule structure representation’, Journal of Chemical Information & Modeling

2. Pistoia Alliance website

3. Milton et al, 2017, 'HELM Software for Biopolymers', Journal of Chemical Information & Modeling

4. HELM monomer library API

5. Download and try out the workflow 'Accessing the HELM Monomer Library' from the KNIME Hub here

Transfer Learning Made Easy with Deep Learning Keras Integration

$
0
0
Transfer Learning Made Easy with Deep Learning Keras IntegrationCoreyMon, 09/16/2019 - 10:00

Author: Corey Weisinger

You’ve always been able to fine tune and modify your networks in KNIME Analytics Platform by using the Deep Learning Python nodes such as the DL Python Network Editor or DL Python Learner, but with recent updates to KNIME Analytics Platform and the KNIME Deep Learning Keras Integration there are more tools available to do this without leaving the familiar KNIME GUI.

Today we want to revisit an older post, from January 2018. The original blog post looked at predicting cancer types from histopathology slide images. In today's article, we detail how we can transfer learning from the convolutional neural network VGG16, a famous image classifier, into our new model for classifying cancer cells. In the older workflow, Python scripts that might not be simple to write for those of us not intimately familiar with the Keras library in Python are now handled with just five easily configured KNIME nodes. You can see the old blog post, 'Using the new KNIME Deep Learning Keras Integration to Predict Cancer Type from Histopathology Slide Images' by Jon Fuller here.

Note that to run this workflow you will need to install the KNIME Deep Learning Keras Integration. Follow the instructions in the link to get ready!

Histopathology - reading images and training a VGG

This article looks at the workflow 'Read Images and Train VGG', which you can find and download on the KNIME Hub here .

Transfer Learning Made Easy with KNIME Deep Learning Keras Integration
Fig. 1 The new, coding free, workflow. This workflow reads image patches, downloaded and prepared by the other workflows in this workflow group. It loads the VGG16 model, trains and fine tunes the output layers. Predictions are made on the hold-out set of images.

The 'Train Model' workflow is part of the 'Read Images and Train VGG' workflow group, which downloads the dataset, preprocesses the images, and trains the model.

Transfer Learning Made Easy with KNIME Deep Learning Keras Integration
Fig. 2 The 'Train Model' part of the workflow group

In the figure below you can see the Python script that would be required to flatten, add layers to, freeze, and train the new model.

Transfer Learning Made Easy with KNIME Deep Learning Keras Integration
Fig. 3 The Python script required to flatten, add layers to, freeze, and train the new model. Used in the Keras Network Reader (left) and Keras Network Learner (right) nodes shown in Figure 2

Now as far as coding goes that’s not too many lines, but what if you wanted to collaborate with a colleague who isn’t familiar with Python or the Keras library, or if you wanted an easy graphical interpretation for a presentation? That’d be a bit of extra work. So instead, we replace the Python script with these KNIME nodes. 

Transfer Learning Made Easy with KNIME Deep Learning Keras Integration
Fig. 4 The Keras Integration KNIME nodes replicating the Python code

The Keras Integration nodes explained

This is much easier to understand at a glance, thanks to the node names, telling you what each one does plus the notes underneath each node, giving you additional information. All of these nodes are also easily configured! We’ll walk through them now to get you familiar with some of the Keras integration, so you can go out there and start building your own custom networks or applying a transfer learning strategy like we do here on your own!

Transfer Learning Made Easy with KNIME Deep Learning Keras Integration


The first thing we do here is run the Keras Network Reader node. This node reads in an .h5 file for a complete network with weights, or a .json or .yaml file to import only a structure. We’ve set it to read an .h5 version of the trained VGG16 model because we want to use all the intelligence that has been embedded inside that network and repurpose it to classify those cancer cell slides from the prior blog post.


Transfer Learning Made Easy with KNIME Deep Learning Keras Integration


No surprises with this node here, we’re just flattening out the prior layer in the VGG16 model in preparation for the extra layers we’ll add next. There’s not even anything to configure! Unless you want to give this a layer a custom name… which might be helpful in a moment. 


Transfer Learning Made Easy with KNIME Deep Learning Keras Integration


Now we finally start doing something, this node will add a layer on top of whatever Keras network you plug into it’s input port - that’s what all those gray boxes you’re seeing represent. You can select the number of layers as well as what kind of activation function you want to use for the neurons. In this case we’ve set 64 neurons with the ReLU function.


Transfer Learning Made Easy with KNIME Deep Learning Keras Integration


Now this node doesn’t actually add a new layer but applies dropout to the prior layer, in this case our 64 neuron ReLU layer. What it will do is zero out a fraction of the input values - inputs to that prior layer. This fraction is the Drop Ratel; we’ve set it to 0.5. This node also has configuration settings for noise shape, and a random seed, since the ‘dropped’ inputs are selected randomly during each training batch.


Transfer Learning Made Easy with KNIME Deep Learning Keras Integration


Another dense layer node, this time we only use 3 neurons and the Softmax activation function because these neurons will represent the probabilities of the different classes of cancer cells we’re training to identify.


Transfer Learning Made Easy with KNIME Deep Learning Keras Integration


Finally, we arrive at the newest Keras node, the Freeze Layers node. With this node we’ll freeze every layer except those that we’ve just added to the end of the VGG16 model above. That’s how we’ll retain all the intelligence of the old model while still repurposing it for our new task! Nothing fancy in the configuration here, just choose which layers to train and which not to train.


This has been a summary of just a few of the customization options in the KNIME Deep Learning Keras Integration; there are many more nodes and possibilities to explore so dive in there!

If you want to read more on predicting cancer cell types and learn all about the pre-processing involved and where to find the data don’t forget to go and revisit the original blog post, 'Using the new KNIME Deep Learning Keras Integration to Predict Cancer Type from Histopathology Slide Images' here.

Resources

Requirements

  • KNIME Analytics Platform v4.x
  • KNIME Rest Client Extension
  • KNIME Image Processing Extension
  • KNIME Python Integration, KNIME Image Processing – Python Extension
  • KNIME Deep Learning – Keras Integration. Find the setup instructions here
Note that you won’t be prompted to install the KNIME Image Processing - Python Extensions when opening the workflows: you have to install manually.
  • You can either drag the extension from the KNIME Hub to the workbench of KNIME Analytics Platform 4.x
  • Or from within KNIME, go to File → Install KNIME Extensions, and select KNIME Image Processing - Python Extensions

The extension is used by the ‘DL Python Network Learner’ to read the ImgPlus cell type from KNIME Image Processing into a format that Keras and Python can use.

Time Series Analysis: A Simple Example with KNIME and Spark

$
0
0
Time Series Analysis: A Simple Example with KNIME and SparkadminMon, 09/23/2019 - 10:00

The task: train and evaluate a simple time series model using a random forest of regression trees and the NYC Yellow taxi dataset

Authors: Andisa Dewi and Rosaria Silipo

I think we all agree that knowing what lies ahead in the future makes life much easier. This is true for life events as well as for prices of washing machines and refrigerators, or the demand for electrical energy in an entire city. Knowing how many bottles of olive oil customers will want tomorrow or next week allows for better restocking plans in the retail store. Knowing the likely increase in the price of gas or diesel allows a trucking company to better plan its finances. There are countless examples where this kind of knowledge can be of help.

Demand prediction is a big branch of data science. Its goal is to make estimations about future demand using historical data and possibly other external information. Demand prediction can refer to any kind of numbers: visitors to a restaurant, generated kW/h, school new registrations, beer bottles required on the store shelves, appliance prices, and so on.

Predicting taxi demand in NYC

As an example of demand prediction, we want to tackle the problem of predicting taxi demand in New York City. In megacities such as New York, more than 13,500 yellow taxis roam the streets every day (per the 2018 Taxi and Limousine Commission Factbook). This makes understanding and anticipating taxi demand a crucial task for taxi companies or even city planners, to increase the efficiency of the taxi fleets and minimize waiting times between trips.

For this case study, we used the NYC taxi dataset, which can be downloaded at the NYC Taxi and Limousine Commission (TLC) website. This dataset spans 10 years of taxi trips in New York City with a wide range of information about each trip, such as pick-up and drop-off date/times, locations, fares, tips, distances, and passenger counts. Since we are just using this case study for demonstration purposes, we used only the yellow taxi subset for the year 2017. For a more general application, it would be useful to include data from a few additional years in the dataset, at least to be able to estimate the yearly seasonality.

Let’s set the goal of this tutorial to predict the number of taxi trips required in NYC for the next hour.

Time series analysis: the process

The demand prediction problem is a classic time series analysis problem. We have a time series of numerical values (prices, number of visitors, kW/h, etc.) and we want to predict the next value given the past N values. In our case, we have a time series of numbers of taxi trips per hour (Figure 1), and we want to predict the number of taxi requests in the next hour given the number of taxi trips in the last N hours.

For this case study, we implemented a time series analysis process through the following steps (Figure 1):

  • Data transformation: aggregations, time alignment, missing value imputation, and other required transformations - depending on the data domain and the business case
  • Time series visualization
  • Removal of non-stationarity/seasonality, if any
  • Data partitioning to build a training set (past) and test set (future)
  • Construction of vector of N past values
  • Training of a machine learning model (or models) allowing for numerical outputs
  • Calculation of prediction error
  • Model deployment, if prediction error is acceptable
Time Series Analysis: A Simple Example with KNIME and Spark
Figure 1. Classic steps in time series analysis

Note that precise prediction of a single numerical value can be a complex task. In some cases, a precise numerical prediction is not even needed and the same problem can be satisfactorily and easily solved after transforming it into a classification problem. And to transform a numerical prediction problem into a classification problem, you just need to create classes out of the target variable.

For example, predicting the price of a washing machine in two weeks might be difficult, but predicting whether this price will increase, decrease, or remain the same in two weeks is a much easier problem. In this case, we have transformed the numerical problem of price prediction into a classification problem with three classes (price increase, price decrease, price unchanged).

Want to learn more about time series analysis? Sign up for our new 1-day KNIME Time Series Analysis Course: Looking at the Internet of Things being held during our KNIME Fall Summit 2019 in Austin, TX, US - November 5-8.

Data cleaning and other transformations

The first step is to move from the original data rows sparse in time (in this case taxi trips, but it could be contracts with customers or Fast Fourier Transform amplitudes just the same) to a time series of values uniformly sampled in time. This usually requires two things:

  • An aggregation operation on a predefined time scale: seconds, minutes, hours, days, weeks, or months depending on the data and the business problem. The granularity (time scale) used for the aggregation is important to visualize different seasonality effects or to catch different dynamics in the signal.
  • A realignment operation to make sure that time sampling is uniform in the considered time window. Often, time series are presented in a single sequence of the captured times. If any time sample is missing, we do not notice. A realignment procedure inserts missing values at the skipped sampling times.

Another classical preprocessing step consists of imputing missing values. Here a number of time series dedicated techniques are available, like using the previous value, the average value between previous and next value, or the linear interpolation between previous and next value.

The goal here is to predict the taxi demand (equals the number of taxi trips required) for the next hour. Therefore, as we need an hourly time scale for the time series, the total number of taxi trips in New York City was calculated for each hour of every single day in the data set. This required grouping the data by hour and date (year, month, day of the month, hour) and then counting the number of rows (i.e., the number of taxi trips) in each group.

Time series visualization

Before proceeding with the data preparation, model training, and model evaluation, it is always useful to get an idea of the problem we are dealing with via visual data exploration. We decided to visualize the data on multiple time scales. Each visualization offers different insight on the time evolution of the data.

In the previous step, we already aggregated the number of taxi trips by the hour. This produces the time series x(t) (Figure 2a). After that, in order to observe the time series evolution on a different time scale, we also visualized it after aggregating by day (Figure 2b) and by month (Figure 2c).

From the plot of the hourly time series, you can clearly see a 24-hour pattern: high numbers of taxi trips during the day and lower numbers during the night.

If we switch to the daily scale, the weekly seasonality pattern becomes evident, with more trips during business days and fewer trips over the weekends. The non-stationarity of this time series can be easily spotted on this time scale, through the varying average value.

Finally, the plot of the monthly time series does not have enough data points to show any kind of seasonality pattern. It’s likely that extending the data set to include more years would produce more points in the plot and possibly a winter/summer seasonality pattern could be observed.

Time Series Analysis: A Simple Example with KNIME and Spark
Figure 2a. Plot of the number of taxi trips in New York City by the hour, zoomed in on the first two weeks of June 2017, from the NYC Taxi data set. The 24-hour seasonality here is quite easy to see
Time Series Analysis: A Simple Example with KNIME and Spark
Figure 2b. Plot of the number of taxi trips, by day, in New York City, zoomed in on the time window between May 2017 and September 2017, from the NYC Taxi dataset. The weekly seasonality here is quite easy to spot. The three deep valleys correspond to Memorial Day, Fourth of July, and Labor Day.
Time Series Analysis: A Simple Example with KNIME and Spark
Figure 2c. Plot of the number of taxi trips, by month, in New York City for the entire year 2017, from the NYC Taxi dataset. You can see the difference between winter (more taxi trips) and summer (fewer taxi trips).

Non-stationarity, seasonality, and autocorrelation function

A frequent requirement for many time series analysis techniques is that the data be stationary.

A stationary process has the property that the mean, variance, and autocorrelation structure do not change over time. Stationarity can be defined in precise mathematical terms, but for our purpose, we mean a flat looking time series, without trend, with constant average and variance over time and a constant autocorrelation structure over time. For practical purposes, stationarity is usually determined from a run sequence plot or the linear autocorrelation function (ACF).

If the time series is non-stationary, we can often transform it to stationary by replacing it with its first order differences. That is, given the series x(t), we create the new series y(t) = x(t) - x(t-1). You can difference the data more than once, but the first order difference is usually sufficient.

Seasonality violates stationarity, and seasonality is also often established from the linear autocorrelation coefficients of the time series. These are calculated as the Pearson correlation coefficients between the value of time series x(t) at time t and its past values at times t-1,…, t-n. In general, values between -0.5 and 0.5 would be considered to be low correlation, while coefficients outside of this range (positive or negative) would indicate a high correlation.

In practice, we use the ACF plot to determine the index of the dominant seasonality or non-stationarity. The ACF plot reports on the y-axis the autocorrelation coefficients calculated for x(t) and its past x(t-i) values vs. the lags i on the x-axis. The first local maximum in the ACF plot defines the lag of the seasonality pattern (lag=S) or the need for a correction of non-stationarity (lag=1). In order not to consider irrelevant local maxima, a cut-off threshold is usually introduced, often from a predefined confidence interval (95%). Again, changing the time scale (i.e., the granularity of the aggregation) or extending the time window allows us to discover different seasonality patterns.

If we found the seasonality lag to be S, then we could apply a number of different techniques to remove seasonality. We could remove the first S-samples from all subsequent S-sample windows; we could calculate the average S-sample pattern on a portion of the data set and then remove that from all following S-sample windows; we could train a machine learning model to reproduce the seasonality pattern to be removed; or more simply, we could subtract the previous value x(t-S) from the current value x(t) and then deal with the residuals y(t) = x(t) - x(t-S). We chose this last technique for this tutorial, just to keep it simple.

Figure 3 shows the ACF plot for the time series of hourly number of taxi trips. On the y-axis are the autocorrelation coefficients calculated for x(t)and its previous values at lagged hour 1, … 50. On the x-axis are the lagged hours. This chart shows peaks at lag=1 and lag=24, i.e., a daily seasonality, as was to be expected in the taxi business. The highest positive correlation coefficients are between x(t) and x(t-1) (0.91), x(t) and x(t-24) (0.83), and then x(t) and x(t-48) (0.68).

If we use the daily aggregation of the time series and calculate the autocorrelation coefficients on a lagged interval n > 7, we would also observe a peak at day 7, i.e., a weekly seasonality. On a larger scale, we might observe a winter-summer seasonality, with people taking taxis more often in winter than in summer. However, since we are considering the data over only one year, we will not inspect this kind of seasonality.

Time Series Analysis: A Simple Example with KNIME and Spark
Figure 3. Autocorrelation plot (Pearson coefficients) over 50 hours. The strongest correlation of x(t) is with x(t-1), x(t-24), and x(t-48), indicating a 24-hr (daily) seasonality.

Data partitioning to build the training set and test set

At this point, the dataset has to be partitioned into the training set (the past) and test set (the future). Notice that the split between the two sets has to be a split in time. Do not use a random partitioning but a sequential split in time! This avoids data leakage from the training set (the past) to the test set (the future).

We reserved the data from January 2017 to November 2017 for the training set and the data of December 2017 for the test set.

Lagging: vector of past N values

The goal of this use case is to predict the taxi trip demand in New York City for the next hour. In order to run this prediction, we need the demands of taxi trips in the previous N hours. For each value x(t) of the time series, we want to build the vector x(t-N), …, x(t-2), x(t-1), x(t). We will use the past values x(t-N), …, x(t-2), x(t-1) as input to the model and the current value x(t) as the target column to train the model. For this example, we experimented with two values: N=24 and N=50.

Remember to build the vector of past N values after partitioning the dataset into a training set and a test set in order to avoid data leakage from neighboring values. Also remember to remove the rows with missing values introduced by the lagging operation.

Training the machine learning model

We've now reached the model training phase. We will use the past part of the vector x(t-N), …, x(t-2), x(t-1) as input to the model and the current value of the time series x(t) as target variable. In a second training experiment, we added the hour of the day (0-23) and the day of the week (1-7) to the input vector of past values.

Now, which model should we use? First of all, x(t) is a numerical value, so we need to use a machine learning algorithm that can predict numbers. The easiest model to use here would be a linear regression, a regression tree, or a random regression tree forest. If we use a linear regression on the past values to predict the current value, we are talking about an auto-regressive model.

We chose a random forest of five regression trees with maximal depth of 10 splits running on a Spark cluster. After training, we observed that all five trees used the past value of the time series at time t-1 for the first split. x(t-1) was also the value with the highest correlation coefficient with x(t) in the autocorrelation plot (Figure 3).

We can now apply the model to the data in the test set. The predicted time series (as in-sample predictions) by a regression tree forest trained on N=24 past values, with no seasonality removal and no first-order difference, is shown in Figure 4 for the whole test set. Predicted time series is plotted in yellow, while original time series is shown in light blue. Indeed, the model seems to fit the original time series quite well. For example, it is able to predict a sharp decrease in taxi demand leading up to Christmas. However, a more precise evaluation could be obtained via some dedicated error metrics.

Time Series Analysis: A Simple Example with KNIME and Spark
Figure 4. Line plot of the predicted vs. actual values of the number of taxi trips in the test set.

Prediction error

The final error on the test set can be measured as some kind of distance between the numerical values in the original time series and the numerical values in the predicted time series. We considered five numeric distances:

  • R2
  • Mean Absolute Error
  • Mean Squared Error
  • Root Mean Squared Error
  • Mean Signed Difference

Note that R2 is not commonly used for the evaluation of model performance in time series prediction. Indeed, R2 tends to produce higher values for higher number of input features, favoring models using longer input past vectors. Even when using a corrected version of R2, the non-stationarity of many time series and their consequent high variance pushes the R2 values quickly close to 1, making it hard to glean the differences in model performance.

The table in Figure 5 reports the two errors (R2 and MAE) when using 24 and 50 past samples as input vector (and no additional external input features), and after removing daily seasonality, weekly seasonality, both daily and weekly seasonality, or no seasonality, or applying the first order difference.

Finally, using the vector of values from the past 24 hours yields comparable results to using a vector of past 50 values. If we had to choose, using N=24 and first order differences would seem to be the best choice.

Time Series Analysis: A Simple Example with KNIME and Spark
Figure 5. R2 and MAE measures calculated on the test set for models trained on differently preprocessed time series. Input features include only the past values of the time series.
Time Series Analysis: A Simple Example with KNIME and Spark
Figure 6. R2 and MAE measures calculated on the test set for models trained on differently preprocessed time series. Here input features include the past values of the time series (on the left) and the same past values plus the hour of day and day of the week (on the right).

Caption for Figure 6. R2 and MAE measures calculated on the test set for models trained on differently preprocessed time series. Here, input features include the past values of the time series (on the left) and the same past values plus the hour of day and day of the week (on the right).

Sometimes it is useful to introduce additional information, for example, the hour of day (which can identify the rush hour traffic) or the day of the week (to distinguish between business days and weekends). We added these two external features (hour and day of week) to the input vector of past values used to train the models in the previous experiment.

Results for the same preprocessing steps (removing daily, weekly, daily and weekly, or no seasonality, or first order differences) are reported on the right and compared to the results of the previous experiment on the left in Figure 6. Again, the first order differences seem to be the best preprocessing approach in terms of final performance. The addition of the external two features has reduced the final error a bit, though not considerably.

The full training workflow is shown in Figure 7 and is available on the KNIME Hub here.

Time Series Analysis: A Simple Example with KNIME and Spark
Figure 7. The complete training workflow shown. Here a random forest of regression trees is trained on the number of taxi trips by the hour for the first 11 months of 2017 to predict taxi demand hour by hour in December 2017, using different preprocessing techniques.

Model deployment

We have reached the end of the process. If the prediction error is acceptable, we can proceed with the deployment of the model to deal with the current time series in a production application. Here there is not much to do. Just read the previously trained model, acquire current data, apply the model to the data, and produce the forecasted value for the next hour.

If you want to run the predictions for multiple hours after the next one, you will need to loop around the model by feeding the current prediction back into the vector of past input samples.

Time series analysis: summing up

We have trained and evaluated a simple time series model using a random forest of regression trees on the 2017 data from the NYC Yellow taxi data set to predict the demand for taxi trips for the next hour based on the numbers in the past N hours. The entire model training and testing was implemented to run on a big data Spark framework.

We have used this chance to go through the classic process for time series analysis step by step, including non-stationarity and seasonality removal, creation of the vector of past values, partitioning on a time split, etc. We have then experimented with different parameters (size of past value vector) and options (non-stationarity and seasonality removal).

Results have shown that the taxi demand prediction is a relatively easy problem to solve, at least when using a highly parametric algorithm like a random forest of decision trees.

The MAE metric on the predictions produced by a model trained on unprocessed data is actually lower than after removing the seasonality. However, the first order differences seem to help the model to learn better.

Finally, we found that a past size N=50 is redundant. N=24 produces equally acceptable performance. Of course, adding additional inputs such as temperature, weather conditions, holiday calendar, and so on might benefit the final results.

An additional challenge might be to predict taxi demand not only for the next hour, which seems to be an easy task, but maybe for the next day at the same hour.

As first published in InfoWorld.

An Experiment in OCR Error Correction & Sharing Treasure on the KNIME Hub

$
0
0
An Experiment in OCR Error Correction & Sharing Treasure on the KNIME HubadminMon, 09/30/2019 - 10:00

Author: Angus Veitch

KNIME: a gateway to computational social science and digital humanities

I discovered KNIME by chance when I started my PhD in 2014. This discovery changed the course of my PhD and my career. Well, who knows: perhaps I would have eventually learned how to do things like text processing, topic modelling and named entity extraction in R or Python. But with no previous programming experience, I did not feel ready to take the plunge into those platforms. KNIME gave me the opportunity to learn a new skill set while still having time to think and write about what the results actually meant in the context of media studies and social science, which was the subject of my PhD research.

KNIME is still my go-to tool for data analysis of all kinds, textual and otherwise. I use it not only to analyse contemporary text data from news and social media, but to analyse historical texts as well. In fact, I think the accessibility of KNIME makes it the perfect tool for scholars in the field knowns as the digital humanities, where computational methods are being applied to the study of history, literature and art.

Mining and mapping historical texts

My own experiments in the digital humanities have focussed on historical Australian newspapers that are freely accessible in an online database called Trove. I have developed methods to combine the thematic and geographic information contained in these historic texts so that I can map the relationships between words and places. This has been a very complex and challenging task, and I have used KNIME every step of the way.

First, I used KNIME to obtain the newspaper data from the Trove API. In the process, I created the Trove KnewsGetter workflow. I then used KNIME to clean the text, identify placenames and keywords, assign geographic coordinates, calculate the statistical associations between the words and places, and prepare the results for use in Google Earth and Google Maps.

The TroveKleaner: an experiment in OCR error correction

When I say that I used KNIME to ‘clean’ historical newspaper texts, I don’t just mean by stripping out punctuation and stopwords, although I did that as well. I also did my best to correct some of the many spelling errors that result from glitches in the optical character recognition (OCR) process through which the scanned texts on Trove have been converted. Some of the original texts in Trove are difficult to read even with the human eye, so it is no surprise that machines have struggled! The example below shows a scanned article next to the OCR-derived text, with the OCR errors shown in red.

An experiment in OCR error correction & sharing treasure on the KNIME Hub
Figure 1. An excerpt from the OCR-derived text from a newspaper article in Trove (right) and the corresponding scanned image (left). OCR errors are coloured red.

I used some highly experimental methods to correct these OCR errors. 

To correct ‘content words’ (that is, everything except for ‘stopwords’ like the or that), I extracted ‘topics’ from the texts using KNIME’s Topic Extractor (Parallel LDA) node and then used string-matching and term-frequency criteria to identify likely errors and their corrections. A high-level view of the steps I used to do this is shown below in Figure 2, while an example of the identified corrections can be seen in Figure 3. 

To correct stopwords, I first identified common stopword errors (which conveniently clustered together in the extracted topics) and then analysed n-grams to work out which valid words appeared in the same grammatical contexts as the errors.

An experiment in OCR error correction & sharing treasure on the KNIME Hub
Figure 2. These nodes within the TroveKleaner identify and apply corrections to content-words. They do this by running a topic model and searching the outputs for pairs of terms that appear to contain an error and its correct form.
An experiment in OCR error correction & sharing treasure on the KNIME Hub
Figure 3. The 63 highest scoring content-word corrections identified by the TroveKleaner from a sample of 20,000 documents.

Neither of these methods was ever going to be perfect or comprehensive, but they worked well enough to make the experiment worthwhile. And well enough, I think, to make the methods worth sharing. So I cleaned up and annotated my workflow to produce the TroveKleaner. (I do my best to include a K in the name of all my KNIME workflows!) As shown in the ‘front panel’ view below, the TroveKleaner contains several separate components, which can be run in an iterative, choose-your-own-adventure fashion.

An experiment in OCR error correction & sharing treasure on the KNIME Hub
Figure 4. The TroveKleaner workflow on the KNIME Hub

Of course, the TroveKleaner will not just work with texts from Trove. The texts could come from anywhere! The only requirement is that your texts number into the hundreds, and preferably thousands. The TroveKleaner draws on nothing except the data itself to identify corrections, and so relies upon the statistical weight of numerous ‘training’ examples in order to work effectively.

If you are interested in the TroveKleaner, you can learn more about it on my blog.

Sharing the TroveKleaner on the KNIME Hub

Like any good scholar working in digital humanities or computational social science, I originally made my workflows, including the TroveKleaner, available on GitHub. That’s where all useful code is shared, right? Perhaps. But KNIME workflows aren’t really code. They work like code, but they are made of something else: I call it kode, in honour of KNIME’s famous first letter. And let’s face it: GitHub was never designed to host kode. Sharing my workflows there has never felt quite right.

This is why I was delighted to learn about the KNIME Hub. Here, finally, is a repository designed especially for sharing kode. No more need for ‘commits’ or ‘pulls’ or clones or readme files! Just a seamless drag-and-drop operation executed from within KNIME Analytics Platform itself.

Originally, this post was supposed to be about how I shared the TroveKleaner on the KNIME Hub. But honestly, there’s hardly anything to write. It just worked, exactly like it is supposed to

With a simple drag-and-drop, my workflow now has an online home where it can be easily found and installed by fellow KNIME users. Its page on the KNIME Hub includes the description, search tags, and links to my own blog that I entered into the workflow metadata from within KNIME. 

Especially useful – and something I hadn’t even considered when I uploaded the workflow to GitHub – is that the KNIME Hub lists the extensions that must be installed for the TroveKleaner to work.

Note that one of these extensions, the fantastic collection of nodes from Palladian, is not in the usual repository of extensions but requires the user to add an additional source (as the authors now want to enforce a different license).

Indeed, the process was so easy that I also went ahead and uploaded my Trove KnewsGetterworkflow to the KNIME Hub. With any luck, I will upload more workflows in the near future!

---------------------------------------------

About Angus Veitch

I play with data, analyse text and make visualisations, often in the service of repackaging history into a more intelligible form. Whatever I do, I strive to communicate it in a clear and engaging way. I maintain two blogs -- one (www.oncewasacreek.org) that uses innovative methods to explore local history, and the other (www.seenanotherway.com) that documents my experiments in data analysis and visualisation. I recently completed a PhD about the use of text analytics in social science and now recently started a new position as Postdoctoral Researcher in the School of Management at RMIT University in Melbourne.

From Modeling to Scoring: Correcting Predicted Class Probabilities in Imbalanced Datasets

$
0
0
From Modeling to Scoring: Correcting Predicted Class Probabilities in Imbalanced DatasetsMaaritMon, 10/07/2019 - 10:00

Authors:Alfredo Roccato (Data Science Trainer and Consultant) and Maarit Widmann (KNIME)

Wheeling like a hamster in the data science cycle? Don’t know when to stop training your model?

Model evaluation is an important part of a data science project and it’s exactly this part that quantifies how good your model is, how much it has improved from the previous version, how much better it is than your colleague’s model, and how much room for improvement there still is.

In this series of blog posts, we review different scoring metrics: for classification, numeric prediction, unbalanced datasets, and other similar more or less challenging model evaluation problems.

Today: Classification on Imbalanced Datasets

It is not unusual in machine learning applications to deal with imbalanced datasets such as fraud detection, computer network intrusion, medical diagnostics, and many more.

Data imbalance refers to unequal distribution of classes within a dataset, namely that there are far fewer events in one class in comparison to the others. If, for example we have credit card fraud detection dataset, most of the transactions are not fraudulent and very few can be classed as fraud detections. This underrepresented class is called the minority class, and by convention, the positive class.

It is recognized that classifiers work well when each class is fairly represented in the training data.

Therefore if the data are imbalanced, the performance of most standard learning algorithms will be compromised, because their purpose is to maximize the overall accuracy. For a dataset with 99% negative events and 1% positive events, a model could be 99% accurate, predicting all instances as negative, though, being useless. Put in terms of our credit card fraud detection dataset, this would mean that the model would tend to classify fraudulent transactions as legitimate transactions. Not good!

As a result, overall accuracy is not enough to assess the performance of models trained on imbalanced data. Other statistics, such as Cohen's kappa and F-measure, should be considered. F-measure captures both the precision and recall, while Cohen’s kappa takes into account the a priori distribution of the target classes.

The ideal classifier should provide high accuracy over the minority class, without compromising on the accuracy for the majority class.

Resampling to balance datasets

To work around the problem of class imbalance, the rows in the training data are resampled. The basic concept here is to alter the proportions of the classes (a priori distribution) of the training data in order to obtain a classifier that can effectively predict the minority class (the actual fraudulent transactions).

Resampling techniques

Undersampling

A random sample of events from the majority class is drawn and removed from the training data. A drawback of this technique is that it loses information and potentially discards useful and important data for the learning process.

Oversampling

Exact copies of events representing the minority class are replicated in the training dataset. However, multiple instances of certain rows can make the classifier too specific, causing overfitting issues.

SMOTE (Synthetic Minority Oversampling Technique)

"Synthetic" rows are generated and added to the minority class. The artificial records are generated based on the similarity of the minority class events in the feature space.

Correcting predicted class probabilities

Let’s assume that we train a model on a resampled dataset. The resampling has changed the class distribution of the data from imbalanced to balanced. Now, if we apply the model to the test data and obtain predicted class probabilities, they won’t reflect those of the original data. This is because the model is trained on training data that are not representative of the original data, and thus the results do not generalize into the original or any unseen data. This means that we can use the model for prediction, but the class probabilities are not realistic: we can say whether a transaction is more probably fraudulent or legitimate, but we cannot say how probably it belongs to one of these classes. Sometimes we want to change the classification threshold because we want to take more/less risks, and then the model with the corrected class probabilities that haven't been corrected wouldn't work any more. 

After resampling, we have now trained a model on balanced data i.e. that contain an equal number of fraudulent and legitimate transactions, which is luckily not a realistic scenario for any credit card provider and therefore - without correcting the predicted class probabilities - would not be informative about the risk of the transactions in the next weeks and months.

If the final goal of the analysis is not only to classify based on the highest predicted class probability, but also to get the correct class probabilities for each event, we need to apply a transformation to the obtained results. If we don’t apply the transformation to our model, grocery shopping with a credit card in a supermarket might raise too much interest! 

The following formula 1 shows how to correct the predicted class probabilities for a binary classifier:

Correcting Predicted Class Probabilities in Imbalanced Datasets

For example, if the proportion of the positive class in the original dataset is 1% and after resampling it is 50%, and the predicted positive class probability is 0.95, applying the correction it gives:

Correcting Predicted Class Probabilities in Imbalanced Datasets

Example: fraud detection

When we apply a classification model to detect fraudulent transactions, the model has to work reliably on imbalanced data. Although few in number, fraudulent transactions can have remarkable consequences. Therefore, it’s worth checking how much we can improve the performance of the model and its usability in practice by resampling the data and correcting the predicted class probabilities. 

Evaluating the cost of a classification model

In the real world, the performance of a classifier is usually assessed in terms of cost-benefit analysis: correct class predictions bring profit, whereas incorrect class predictions bring cost. In this case, fraudulent transactions predicted as legitimate cost the amount of fraud, and transactions predicted as fraudulent - correctly or incorrectly - bring administrative costs. 

Administrative costs (Adm) are the expected costs of contacting the card holder and replacing the card if the transaction was correctly predicted as fraudulent, or reactivating it if the transaction was legitimate. Here we assume, for simplicity, that the administrative costs for both cases are identical.

The cost matrix below summarizes the costs assigned to the different classification results. The minority class, “fraudulent”, is defined as the positive class, and “legitimate” is defined as the negative class.

Correcting Predicted Class Probabilities in Imbalanced Datasets
Table 1: The cost matrix that shows the costs assigned to different classification results as obtained by a model for fraud detection. Correctly classified legitimate transactions bring no cost. Fraudulent transactions predicted as legitimate cost the amount of fraud. Transactions predicted as fraudulent bring administrative costs.

Based on this cost matrix, the total cost of the model is:

Correcting Predicted Class Probabilities in Imbalanced Datasets

Finally, the cost of the model will be compared to the amount of fraud. Cost reduction tells how much cost the classification model brings compared to the situation where we don’t use any model:

Correcting Predicted Class Probabilities in Imbalanced Datasets

The workflow

In this example we use the "Credit Card Fraud Detection" dataset provided by Worldline and the Machine Learning Group of ULB (Université Libre de Bruxelles) on big data mining and fraud detection. The dataset contains 284 807 transactions made by European credit card holders during two days in September 2013. The dataset is highly imbalanced: 0.172 % (492 transactions) were fraudulent and the rest were normal. Other information on the transactions has been transformed into principal components.

The workflow in Figure 1 shows the overall process of reading the data, partitioning the data into a training and test set, resampling the data, training a classification model, predicting and correcting the class probabilities, and evaluating the cost reduction. We selected SMOTE as the resampling technique and logistic regression as the classification model. Here we estimate administrative costs to be 5 euros. You can inspect and download the workflow from the KNIME Hub.

The workflow provides three different scenarios for the same data: 

  1. training and applying the model using imbalanced data
  2. training the model on balanced data and applying the model to imbalanced data without correcting the predicted class probabilities
  3. training the model on balanced data and applying the model to imbalanced data where the predicted class probabilities have been corrected
Corrected Class Probabilities Workflow
Figure 1: Workflow that compares three ways of training and applying a classification model using imbalanced data. Firstly, the model training is done on imbalanced data. Secondly, the training set is resampled using SMOTE to make it balanced. Thirdly, the training set is resampled using SMOTE and predicted class probabilities are corrected based on the a priori class distribution of the data. The workflow is available on the KNIME Hub https://kni.me/w/0ufkiBeS8F8x6bhW

Estimating the cost for scenario 1 without resampling

A logistic regression model provides these results:

Correcting Predicted Class Probabilities in Imbalanced Datasets
Table 2: The confusion matrix, class statistics and estimated cost reduction obtained by a fraud detection model that was trained on imbalanced data. The cost reduction is evaluated using the formula in the “Evaluating the cost of a classification model” section.

The setup in this scenario provides good values for F-measure and Cohen’s Kappa statistics, but a relatively high False Negative Rate (40.82 %). This means that more than 40 % of the fraudulent transactions were not detected by the model - increasing the amount of fraud and therefore the cost of the model. The cost reduction of the model compared to not using any model is 42%.

Estimating the cost for scenario 2 with resampling

A logistic regression model trained on a balanced training set (oversampled using SMOTE) yields these results:

Correcting Predicted Class Probabilities in Imbalanced Datasets
Table 3: The confusion matrix, class statistics and estimated cost obtained by a fraud detection model that was trained on an oversampled, balanced data. The cost is evaluated using the formula in the “Evaluating the cost of a classification model” section.

The False Negative Rate is very low (12.24 %), which means that almost 90 % of the fraudulent transactions were detected by the model. However, there are a lot of “false alarms” (391 legitimate transactions predicted as fraud) that increase the administrative costs. However, the cost reduction achieved by training the model on a balanced dataset is 64% - higher than what we could reach without resampling the training data. The same test set was used for both scenarios.

Estimating the cost for scenario 3 with resampling and correcting the predicted class probabilities

A logistic regression model trained on a balanced training set (oversampled using SMOTE) yields these results when the predicted probabilities have been corrected according to the a priori class distribution of the data:

Correcting Predicted Class Probabilities in Imbalanced Datasets
Table 4: The confusion matrix, class statistics and estimated cost as obtained by a fraud detection model that was trained on an oversampled, balanced data, and where the predicted class probabilities were corrected according to the a priori class distribution. The cost is evaluated using the formula in the “Evaluating the cost of a classification model” section.

As the results for this scenario in Table 4 show, correcting the predicted class probabilities leads to the best model of these three scenarios in terms of the greatest cost reduction. 

In this scenario, where we train a classification model on an oversampled data and correct the predicted class probabilities according to the a priori class distribution in the data, we reach a cost reduction of 75 % compared to not using any model. 

Of course, the cost reduction depends on the value of the administrative costs. Indeed, we tried this by changing the estimated administrative costs and found out that this last scenario can attain cost reduction as long as the administrative costs are 0.80 euros or more.

Summary

Often, when we train and apply a classification model, the interesting events in the data belong to the minority class and are therefore more difficult to find: fraudulent transactions among the masses of transactions, disease carriers among the healthy people, and so on.

From the point of view of the performance of a classification algorithm, it’s recommended to make the training data balanced. We can do this by resampling the training data. Now, the training of the model works better, but how about applying it to new data, which we suppose to be imbalanced? This setup leads to biased values for the predicted class probabilities, because the training set does not represent the test set or any new, unseen data. 

Therefore, to obtain an optimal performance of a classification model together with reliable classification results, correcting the predicted class probabilities by the information on the a priori class distribution is recommended. As the use case in this blog post shows, this correction leads to better model performance and concrete profit.

References

1. Marco Saerens, Patrice Latinne, and Christine Decaestecker. Adjusting the outputs of a classifier to new a priori probabilities: a simple procedure. Neural computation 14(1):21–41, 2002.

About the authors

Maarit Widmann


Maarit Widmann is a data scientist at KNIME. She started with quantitative sociology and holds her Bachelor degree in social sciences. The University of Konstanz made her drop the "social" part when she completed her Master of Science! She now communicates concepts behind data science in videos and blog articles.


Alfredo Roccato


Alfredo Roccato is an independent consultant and trainer with a focus on data science. After studying statistics at the Catholic University in Milan, he has been serving companies with business intelligence and analytics for over thirty-five years.


Guided Visualization and Exploration

$
0
0
Guided Visualization and ExplorationadminMon, 10/14/2019 - 10:00

Authors:Scott Fincher, Paolo Tamagnini, Maarit Widmann

Guided Visualization and Exploration

No matter if we are experienced data scientists or business analysts, one of our daily routines is the easy and smooth extraction of the relevant information from our data regardless of the kind of analysis we are facing.

A good practice for this is to use data visualizations: charts and graphs to visually summarize the complexity in the data. The required expertise for data visualization can be divided in two main areas:

  • The ability to correctly prepare and select a subset of the dataset columns and visualize them in the right chart
  • The ability to interpret the visual results and take the right business decisions based on what is displayed

In this blog post we will see how visual interfaces for business intelligence, i.e. Guided Analytics, can help you in creating visualizations on the fly and also identify complex patterns via those visualizations.

Guided Visualization is about guiding the business analyst from raw data to a customized graph. The business analyst is led through the process and prompted to select the columns to be visualized, while everything else is automated. In contrast, Guided Exploration navigates the data scientist from large masses of data to an automatically computed set of visualizations showing statistically interesting patterns. 

In the final section of this article, we summarize the common practices and strategies used to build those Guided Analytics applications, such as re-using functionalities by sharing components.

Guiding a business analyst from data selection to the right graphs

The challenges of data visualization

Often our data at hand contain values in data types that are not suitable for our analysis. For example, how do we calculate the number of days between two events, if the the date values are reported as String? The numbers “6” and “7” make more sense as String, if they indicate Friday and Saturday, don’t they? These kinds of data quality issues affect not only how successful we are in further analyzing the data, but they also affect our choice of graphs for reporting. For example, if we want to plot values by time, or assign a color to a day of the week, these columns have to have the appropriate data types. 

However, even with perfect data, we don’t always end up with an optimal visualization that shows how the data have developed or highlights relationships in the data. The right graph depends on our purpose: Do we want to visualize one or more features? Are the features categorical or numeric? Here it comes down to our expertise as a business analyst to select the graph that best communicates our message.

The task of selecting the best graph has not necessarily become easier with the increasing number of graphs and visualization tools available. Additionally, the easier we make it for ourselves to build a graph (visualization), the more difficult it becomes to intervene in the process (guided). Ideally, we would like to combine our business expertise - allowing the business analyst to intervene and add their knowledge - with the automated data science tasks - i.e automatically creating the visualization based on the expertise supplied. 

Guided Visualization: automating when possible and interacting when needed

The cost of many all-in-one visualization solutions is that they don’t consider the whole process of data visualization from accessing the raw data to downloading a customized graph. Using these types of tools we would get a graph despite having provided unclean data. And if we wanted to visualize only a subset of the data, we would probably have to filter the input data first. Without filtering the input data first, a graph showing sales developments for the last year could be our only choice, given that the data consists of sales for the whole year: not that useful if we’re only interested in developments in the last quarter. 

Guided Visualization provides a more comprehensive view of the process of building graphs as shown in Figure 1.

Guided Visualization and Exploration
Fig. 1: The process of data visualization from accessing raw data to downloading and deploying a customized graph. The Guided Visualization application considers the whole process and allows user interaction in the middle of it.

In the data cleaning phase, even advanced business analysts can easily overlook columns that contain only constant values or numeric columns with few distinct values. Date&Time values are easier to spot, but we need to make sure that we don’t lose or change any information when we convert their data type. Given these challenges, we want to automate as many of these tasks as possible, yet not trust the results blindly. In the process of Guided Visualization, the business analyst can check the results after each process step and, if needed, apply further changes. 

After the data preparation and column selection step, we are ready to move on to building the first version of the graph. If we were asked whether we preferred a line plot, a bar chart, etc., few of us could build these options in their minds and make the decision. In the Guided Visualization process, selecting the relevant graph is made easier by way of a dashboard, which shows a collection of potential and relevant graphs. At this point, the expertise of a business analyst is brought back into the process: Which graph serves my purpose best? Are the title and labels informative? Is the range of the graph appropriate? These changes can be applied via the interactive dashboard. Once ready, the final step is to download the graph as an image file.

Guided Visualization workflow

The Guided Visualization process as described above requires a logic that automates the process steps from data cleaning to selecting the columns to be visualized, accessing a set of relevant graphs, selecting and customizing the graphs, through to downloading the final graphs as image files. The process is partly affected by the business analyst’s decisions at the interaction points. 

So let’s have a look at the Guided Visualization workflow itself and the steps that are involved. Figure 2 shows these steps. Each component enables user interaction during the process, whereas the calculations between the components take place fully automatically in the background. You can download the workflow from the KNIME Hub

Guided Visualization and Exploration
Fig. 2: A workflow for Guided Visualization that asks for interaction in the process steps for reading the data, selecting the columns to visualize, customizing the graphs, and downloading the final images. All other process steps, such as converting the domains of the columns and removing columns with only constant values, happen automatically in the background. The workflow can be downloaded from the KNIME Hub.

Components enable interaction: Upload ->Select Columns ->Select Domains ->Customize ->Download

  • The first interaction point is enabled by the “Upload” component where the business analyst selects a data file
  • The second interaction point is enabled by the “Select Columns” component. It produces an interactive dashboard, which the business analyst can use to select which column(s) to visualize
  • The third interaction point, the “Select Domains” component, is optional. At this point, the business analyst can manually change the data types of the selected columnsThe fourth interaction point is the “Customize” component. It shows a collection of relevant graphs based on the number of columns and their data types. Here the business analyst can select one or more graphs, change their labels, zoom them, and apply other visual changes
  • The fifth and final interaction point is the “Download” component that enables downloading the selected and customized graphs as images.

Of course not all of the specific requests of the business analyst will match the steps of guided visualization we’ve described above. However, the same logic remains useful in extended and modified versions of the same process. For example, it’s easy to insert more interaction points as components into our workflow (in Figure 2). We could also provide more graphs than are provided by the process so far (Figure 3). We would do this by adding new nodes inside the nested components shown in Figure 4.

Guided Visualization and Exploration
Fig. 3: Some of the possible graphs generated by the Guided Visualization process when the business analyst has selected two columns.
Guided Visualization and Exploration
Fig. 4: A workflow showing one process step (the “Customize” component in the workflow available on the KNIME Hub) in the Guided Visualization process. Here a selection of graphs is generated based on the number and type of the selected columns. Each selection of graphs can be enhanced with other nodes for visualization into the corresponding component.

Guiding a data scientist from unexplored data to interesting data

More experienced users, like for example data scientists, might also find the process of visualizing data challenging, especially if the data come from an unexplored and complex dataset. By complex we mean hundreds of columns with cryptical names for example. This problem is common in the earliest stage of the analytics process where the expert needs to understand the data before making any assumptions. Data visualization is a powerful tool for data exploration, however, if we have hundreds of unknown columns what needs to be visualized first?

Automatically visualizing interesting patterns between columns

One approach to quickly find the interesting columns to visualize is by using statistical tests. Here, we take a good sample of our really large dataset and we start computing a number of statistics for single columns, pairs of columns, and even groups of columns. This is usually computationally expensive so we should make sure that the sample we take isn’t too big.

Using this approach we find interesting patterns - for example the most correlated pair of columns (Figure 6), a column with a skewed distribution, or one with a profusion of outliers. The statistical tests naturally take the domain of the data into account. For example, if we want to find an interesting relationship between a categorical and a numeric column, we wouldn’t use correlation measures but the ANOVA test (Figure 7) instead.

Ultimately, we will find a long list of patterns and relationships to be visualized. What then? Well based on what we want to visualize, we can find the best visualization for each interesting pattern. How do we visualize the most correlated columns? We can use a scatter plot. How can we show outliers in a column? We could use a box plot. Finding the best visualization for each interesting pattern is a crucial step and might need some visualization background. But what if we had a tool able to automatically first find those patterns and then also visualize them in the most suitable chart? All we then have to do is to provide the data and the tool gives us visualizations in return.

Guided Exploration workflow

This is what our KNIME workflow for Guided Exploration does.You can see it in Figure 5: it reads the data, computes the statistics, and creates a dashboard (Figure 6), which visualizes them. Nice right?

Guided Visualization and Exploration
Fig. 5: A workflow for guided exploration that asks for raw data, calculates statistics on the data and automatically visualizes the found patterns and relationships in a dashboard. This can help data scientists in quickly exploring and understanding complex data. The workflow can be downloaded from the KNIME Hub.
Guided Visualization and Exploration
Fig. 6: Parts of the dashboard generated by the Guided Exploration workflow. The graphs show highly correlated and inverse correlated columns in scatter plots for the numeric columns and in a sunburst chart for the categorical columns. The automatically generated dashboard can help data scientists to understand and explore a complex data.

The human in the loop

In raw data, the most intense patterns are actually the result of columns of a bad quality: two columns that are practically identical would subsequently give high correlation; or columns with too many constant or missing values, and so on. Furthermore we might have columns with obvious relationships because they, for example, measure the same thing but with different units. Examples of these patterns are shown in Figures 6 and 7.

Whatever the cause, it is likely that the first time we visualize statistics calculated on raw data our results will be disappointingly boring. That is why our dashboard is in a Recursive Loop, as shown in the workflow in Figure 5.

The way this works is that we can iteratively remove the columns that are not interesting for some reason. We become the Human-in-the-Loop and iteratively choose which data columns should be kept and which should not, based on what the dashboard shows us. After a few iterations we will see a good number of interesting charts. All we need to do now is sit back, relax, let the workflow take us through a univariate and multivariate analysis, and extract the important information.

Guided Visualization and Exploration
Fig. 7: These two visualizations, a stacked histogram and a conditional box plot, show both the relationship between the distribution of a numeric column (DepTime) and a categorical column (delay_class). We can see how the two subsets of data assume a different distribution. If we partitioned the data using the two categorical values “delay” and “no delay”, we could confirm this using an ANOVA test.

Executing from the KNIME WebPortal

You can download the workflow from the KNIME Hub, deploy it to your KNIME Server and execute it from the KNIME WebPortal, and - iteration after iteration - discard columns from any web browser. At the end of the loop it is up to you what you want to do with the few relevant columns that are left. You could simply output the results, or add more nodes to the workflow and immediately extend your analysis with other techniques. You might for example train a simple regression model given the lucky correlation with your target that you’ve just found - thanks to this process. Let us know what you come up with and share your solution on the KNIME Hub!

Customizable and reusable process steps

If you look closely at the two workflows presented above (as well as the Guided Automation workflow available on the KNIME Hub) you’ll notice that there are quite a few similarities between them. Things like the layout, internal documentation, overall style, and functionality are consistent across these workflows. This is by design, and you can incorporate this consistency in workflows too - you just need to take advantage of a few features that KNIME offers.

Layouting and page design

Guided Visualization and Exploration


By using the newly updated layout panel in WebPortal preparation, we have the ability to make consistently formatted pages, complete with padding, titles, headers, footers, sidebars - everything needed to make a professional looking combined view.


Guided Visualization and Exploration

When combined with an initial CSS Editor node, we can define presentation elements like font selection, size, and placement in a single component and then pass those downstream to all subsequent nodes for a consistent display.


Guided Visualization and Exploration


We can even develop custom HTML to create dynamic headers. This HTML can be passed as flow variables to add additional descriptive content too, like context senstive help text that appears next to visualizations.


The above are all elements of layout and page design that were used in the Guided Visualization and Guided Exploration workflows: arranging the components' views that correspond to web pages, enhancing the display and consistency with CSS styling and customizing the appearance of the KNIME WebPortal with dynamic headers and sidebars.

Component re-use and sharing

Beyond just similarity in look-and-feel between workflows, we also re-used functionality between workflows where it made sense to do so. After all, why create workflow functionality from scratch if it has already been implemented and tested in an existing workflow? There’s no need to re-invent the wheel, right?

For common tasks that we needed to implement in these workflows - things like uploading files, selecting columns, saving images, and so forth - we built a component. KNIME makes it simple to save components in your local repository or in your personal private/public space on the KNIME Hub for easy reuse, which can save a lot of time.

Now, with the new KNIME Hub, we also have the ability to import components and nodes directly into our own workflows! Give it a try yourself.

Guided Visualization and Exploration
Fig. 8: Reusing a shared component by dragging and dropping it from the KNIME Hub to the workflow editor

Components vs. metanodes

Another area of consistency in these workflows was the way we used components, as opposed to metanodes. We made a conscious decision early on to make use of components whenever we knew a user interaction point in the webportal would be required. So whenever the user is asked, for example, to choose columns for a model, or perhaps select a particular graph for visualizing data, this option was always included in component form.

Guided Visualization and Exploration
Fig. 9: Examples of shared components that encapsulate often repeated tasks in the Guided Visualization and Guided Exploration workflows, and enable user interaction in the view that they produce.

We used metanodes regularly too, but for different reasons. Where logical operations, automated functions, or just simple organization and cleanup were needed, this is where metanodes were brought in. When needed, we would nest metanodes within each other - sometimes multiple times. This process is all about making sure the workflow has a clean look, and is easy to understand.

Workflow design considerations

When you’re designing your own workflows, you might even want to think about this method for using components and metanodes from the very beginning. Before dragging and dropping individual nodes into a workflow, start first with empty components and metanodes that represent the overall functionality. It might look something like this:

Guided Visualization and Exploration
Fig. 10: The process steps in the workflow for Guided Visualization. Each component inside the upper box corresponds to an interaction point, and each metanode inside the lower box corresponds to an automated process step.

By first considering what your interaction points will be, along with what type of logic and automation might be required, you have an overall roadmap for what your end workflow could look like. You can then go back and “fill in” the components and metanodes with the functionality you need. The advantage of designing this way is that it can massively speed up future workflow development, because you’ve built in potentially reusable components right from the start.

Another thing to consider in your workflow design is the tradeoff between user interaction and automation. Your users will often do some amazing things when running workflows, and some of the choices they make may be quite unexpected. The more user interaction you offer, the more potential there is for unknown behavior - which will require you to develop additional control logic to anticipate such behavior. On the other hand, fewer interaction points will lead to less complex workflows that aren’t as flexible. You’ll have to decide where the sweet spot is, but in practice we’ve found that a good approach is to focus on only those interactions that are absolutely necessary. It turns out that even with minimal interactions, you can still build some very impressive webportal applications!

Summary

The processes of Guided Visualization and Exploration require a number of decisions: What are the most important columns for my purpose? How do I visualize them? Are all columns necessary to keep in the data? Do they have the appropriate data types?

A business analyst might easily explain the development shown by a graph, but comparing different ways of visualizing the development might be outside of his/her interest or expertise. On the other hand, someone who’s an expert in building fancy graphs doesn’t necessarily have the best understanding for interpreting them. That’s why an application that automates the steps that require out-of-domain expertise can be practical in completing day-to-day tasks. 

Here we have shown how a business analyst can start with raw data and generate relevant and useful visualizations. On top of that, we’ve presented a workflow that can help a data scientist gain better understanding of complex data.

Our Phil Winters calls these two target groups muggles and wizards. Wait, Phil said what? Check out this video or come to the KNIME Fall Summit November 5-8 in Austin, TX to see us live!

Labeling with Active Learning

$
0
0
Labeling with Active LearningadminThu, 10/17/2019 - 10:00

Authors:By Paolo Tamagnini and Rosaria Silipo

The ugly truth behind all that data

We are in the age of data. In recent years, many companies have already started collecting large amounts of data about their business. On the other hand, many companies are just starting now. If you are working in one of these companies, you might be wondering what can be done with all that data.

What about using the data to train a supervised machine learning (ML) algorithm? The ML algorithm could perform the same classification task a human would, just so much faster! It could reduce cost and inefficiencies. It could work on your blended data, like images, text documents, and just simple numbers. It could do all those things and even get you that edge over the competition.

However, before you can train any decent supervised model, you need ground truth data. Usually, supervised ML models are trained on old data records that are already somehow labeled. The trained models are then applied to run label predictions on new data. And this is the ugly truth: Before proceeding with any model training, any classification problem definition, or any further enthusiasm in gathering data, you need a sufficiently large set of correctly labeled data records to describe your problem. And data labeling — especially in a sufficiently large amount — is … expensive.

By now, you will have quickly done the math and realized how much money or time (or both) it would actually take to manually label all the data. Some data are relatively easy to label and require little domain knowledge and expertise. But they still require lots of time from less qualified labelers. Other data require very precise (and expensive) expertise of that industry domain, likely involving months of work, expensive software, and finally, some complex bureaucracy to make the data accessible to the domain experts. The problem moves from merely expensive to prohibitively expensive. As do your dreams of using your company data to train a supervised machine learning model.

Unless you did some research and came across a concept called “active learning,” a special instance of machine learning that might be of help to solve your label scarcity problem.

What is active learning?

Active learning is a procedure to manually label just a subset of the available data and infer the remaining labels automatically using a machine learning model.

The selected machine learning model is trained on the available, manually labeled data and then applied to the remaining data to automatically define their labels. The quality of the model is evaluated on a test set that has been extracted from the available labeled data. If the model quality is deemed sufficiently accurate, the inferred class labels extended to the unlabeled data are accepted. Otherwise, an additional subset of new data is extracted, manually labeled, and the model retrained. Since the initial subset of labeled data might not be enough to fully train a machine learning model, a few iterations of this manual labeling step might be required. At each iteration, a new subset of data to be manually labeled needs to be identified.

As in human-in-the-loop analytics, active learning is about adding the human to label data manually between different iterations of the model training process (Fig. 1). Here, human and model each take turns in classifying, i.e., labeling, unlabeled instances of the data, repeating the following steps.

Step a – manual labeling of a subset of data

At the beginning of each iteration, a new subset of data is labeled manually. The user needs to inspect the data and understand them. This can be facilitated by proper data visualization.

Step b – model training and evaluation

Next, the model is retrained on the entire set of available labels. The trained model is then applied to predict the labels of all remaining unlabeled data points. The accuracy of the model is computed via averaging over a cross-validation loop on the same training set. In the beginning, the accuracy value might oscillate considerably as the model is still learning based on only a few data points. When the accuracy stabilizes around a value higher than the frequency of the most frequent class and the accuracy value no longer increases — no matter how many more data records are labeled — then this active learning procedure can stop.

Step c – data sampling

Let’s see now how, at each iteration, another subset of data is extracted for manual labeling. There are different ways to perform this step (query-by-committee, expected model change, expected error reduction, etc.), however, the simplest and most popular strategy is uncertainty sampling.

This technique is based on the following concept: Human input is fundamental when the model is uncertain. This situation of uncertainty occurs when the model is facing an unseen scenario where none of the known patterns match. This is where labeling help from a human — the user — can change the game. Not only does this provide additional labels, but it provides labels for data the model has never seen. When performing uncertainty sampling, the model might need help at the start of the procedure to classify even simple cases, as the model is still learning the basics and has a lot of uncertainty. However, after some iterations, the model will need human input only for statistically more rare and complex cases.

After this step c, we always start again from the beginning, step a. This sequence of steps will take place until the user decides to stop. This usually happens when the model cannot be improved by adding more labels.

Why do we need such a complex procedure as active learning?

Well, the short answer is: to save time and money. The alternative would probably be to hire more people and label the entire dataset manually. In comparison, labeling instances using an active learning approach is, of course, more efficient.

Labeling with Active Learning

Fig. 1. A diagram that visually represents the active learning framework. We start with a large amount of unlabeled data. At each iteration, a subset of the data is manually labeled by a domain expert (step a). Now with more labeled data, the model is retrained (step b) and those instances identified by the model as having the highest uncertainty are selected (step c). These instances are labeled next. An so on. At the end of the process, when the domain expert is confident the model performs well and stops the labeling cycle, the final model is retrained one last time on all the manually obtained labels and then exported.

Uncertainty sampling

Let’s have a closer look now at the uncertainty sampling procedure.

As for a good student, it is more useful to clarify what is unclear rather than repeat what the student has already assimilated. Similarly, it is more useful to add manual labels to data which the model cannot classify with confidence, rather than to data about which the model is already confident. 

Data where the model outputs different labels with comparable probabilities are the data about which the model is uncertain. For example, in a binary classification problem, the most uncertain instances are those with a classification probability of around 50% for both classes. In a multi-classification problem, highest uncertainty predictions happen when all class probabilities are close. This can be measured via the entropy formula from information theory or, better yet, a normalized version of the entropy score.

Labeling with Active Learning
Formula 1: Prediction entropy whereliis one of the n mutually exclusive labels. The sum of probabilities on all classes/labels for a single data row must add up to 1.

Let’s consider two different data rows feeding a 3-class classification model. The first row was predicted to belong to class 1 (label 1) with 90% probability and to class 2 and class 3 with only 5% probability. The prediction here is clear: label 1. The second data row, however, has been assigned a probability of belonging to all three labels of 33%. Here the class attribution is more complicated.

Let’s measure their entropy. Data in Row1 has a higher entropy value than data in Row0 (Table 1), and this is not surprising. This selection via entropy score can work with any number n of classes. The only requirement is that the sum of the model probabilities always adds up to 1.

Labeling with Active Learning
Table 1: The model has assigned two unlabeled data rows to different classes with different probabilities. These probabilities are used to compute the entropy score, which determines which data row will be labeled manually first. The model is most uncertain for Row1 in comparison to Row0, which we can see by the higher entropy score.

Summarizing, a good active learning system should extract all those rows for manual labeling that will benefit most from human expertise rather than more obvious scenarios. After a few iterations, the human-in-the-loop should find the selection of data rows for labeling less random and more unique.

Active learning as a Guided Labeling web application

In this section, we would like to describe a preconfigured and free blueprint web application that implements the active learning procedure on text documents, using KNIME software and involving human labeling between one iteration and the next. Since it takes advantage of the Guided Analytics feature available with KNIME Software, it was named “Guided Labeling.”

The application offers a default dataset of movie reviews from Kaggle. For this article, we focus on a sentiment analysis task on this default dataset. The set of labels is therefore quite simple and includes only two: “good” and “bad.”

The Guided Labeling application consists of three stages (Fig. 2).

1. Data upload and label set definition. The user, our “human in the loop,” starts the application and uploads the whole dataset of documents to be labeled and the set of labels to be applied (the ontology).

2. Active learning. This stage implements the active learning loop.

  • Iteration after iteration, the user manually labels a subset of uncertain data rows
  • The selected machine learning model is subsequently trained and evaluated on the remaining subset of labeled data. The increase in model accuracy is monitored until it stabilizes and/or stops increasing
  • If the model quality is deemed not yet sufficient, a new subset of data containing the most uncertain predictions is extracted for the next round of manual labeling via uncertainty sampling

3. Download of labeled dataset. Once it is decided that the model quality is sufficient, the whole labeled dataset — with labels by both human and model — is exported. The model is retrained one last time on all available instances, used to score documents that are still unlabeled, and is then made available for download for future deployments.

Labeling with Active Learning

Fig. 2. The three stages of the Guided Labeling web application: data upload and label set definition, the active learning cycle, and labeled dataset download.

From an end user’s perspective, these three stages translate to the following sequence of web pages (Fig. 3).

Labeling with Active Learaning

Fig. 3. The stages of Figure 2 implemented in the Guided Labeling web based application for active learning on text documents.

In the first page, the end user has the possibility to upload the dataset and define the label set. The second page is an easy user interface for the quick manual labeling of the data subset from uncertainty sampling.

Notice that this second page can display a tag cloud of terms representative of the different classes. Tag clouds are a visualization used to quickly show the relevant terms in a long text that would be too cumbersome to read in full. We can use the terms in the tag cloud to quickly index documents that are likely to be labeled with the same class. Words are extracted from manually labeled documents belonging to the same class. The top most frequent 50 terms across classes are selected. Of those 50 terms, only the terms present in the still unlabeled documents are displayed in an interactive tag cloud and color coded depending on the document class.

There are two labeling options here:

  • Label the uncertain documents one by one as they are presented in decreasing order of uncertainty. This is the classic way to proceed with labeling in an active learning cycle.
  • Select one of the words in the tag cloud and proceed with labeling the related documents. This second option, while less traditional, allows the end user to save time. Let’s take the example of a sentiment analysis task: By selecting one “positive” word in the tag cloud, mostly “positive” reviews will surface in the list, and therefore, the labeling is quicker.

Note. This Guided Labeling application works only with text documents. However, this same three-stage approach can be applied to other data types too, for example, images or numerical tabular data.

Guided Labeling in detail

Let’s check these three stages one by one from the end user point of view.

Stage 1: Data upload and label set definition

Labeling with Active Learning

Fig. 4. The user interface for the first stage. The user provides the data: he/she can upload new data or use the default movie review data. The user also has to provide a set of labels to be assigned.

The first stage is the simplest of the three, but this does not make it less important. It consists of two parts (Fig. 4):

  • Uploading a CSV file containing text documents with only two features: “Title” and “Text” 
  • Defining the set of classes, e.g., “sick” and “healthy” for text diagnosis of medical records or “fake” and “real” for news articles. If too many possible classes exist we can upload a CSV file listing all the possible string values the label can assume

Stage 2: Active learning

It is now time to start the iterative manual labeling process.

To perform active learning, we need to complete three steps, just like in the diagram at the beginning of the article (Fig. 1).

Step 2a – manual labeling of a subset of data

The subset of data to be labeled is extracted randomly and presented on the left side (Fig. 5.1 A) as a list of documents.

If this is the first iteration, no tag clouds are displayed, since no classes have been attributed. Let’s go ahead and, one after the other, select, read and label all documents as “good” or “bad” according to their sentiment (Fig. 5.1 B).

The legend displayed in the center shows the colors and labels to use. Only labeled documents will be saved and passed to the next model training phase. So, if a typo is detected or a document was skipped, this will not be included in the training set and will not affect our model. Once we are done with the manual labeling, we can click “Next” at the bottom to start the next step and move to the next iteration.

If this is not the first iteration anymore and if the selected machine learning model has already been trained, a tag cloud is created from the already labeled documents. The tag cloud can be used as a shortcut to search for meaningful documents to be labeled. By selecting a word, all those documents containing that word are listed. For example, the user can select the word “awful” in the word cloud and then go through all the related documents. They are all likely to be in need of a “bad” label (Fig 5.2)!

Labeling with Active Learning

Fig. 5.1. The user interface for the very first iteration of the labeling stage. The model is yet to be trained so the application provides a random set of documents to be labeled (A). In this figure, the first document is selected and labeled "bad". The labels attached to each document are randomly assigned, since the model has not yet been trained and manual labeling has not yet been provided. The user can manually apply a label to the selected document using a table editor (B).

Step 2b – training and evaluating an XGBoost model

Based on a subset of the few labeled documents to be used as a training set, an XGBoost model is trained to predict the sentiment of the documents. The model is also evaluated on the same labeled data. Finally, the model is applied to all data to produce a label prediction for each review document.

After labeling several documents, the user can see the accuracy of the model improving in a bar chart. When accuracy reaches the desired performance, the user can check the check box “Stop Labeling” at the top of the page, then hit the “Next” button and get to the application’s landing page.

Step 2c – data sampling

Based on the model predictions, the entropy scorer is calculated for all yet unlabeled data rows; uncertainty sampling is applied to extract the best subset for the next phase of manual labeling. The whole procedure then restarts from step 2a.

Labeling with Active Learning

Fig. 5.2. The term "awul" (highlighted with the color of the "bad" class) is selected to display only movie reviews with the word "awful" in them.

Stage 3: Download of labeled dataset

We reached the end of the application. The end user can now download the labeled dataset, with both human and machine labels, and the model trained to label the dataset.

Two word clouds are made available for comparison: on the right, the word cloud of those documents labeled by the human in the loop and on the left, the word cloud of machine labeled documents. In both clouds, words are color coded by document label: red for “good” and purple for “bad.” If the model is performing a decent job at labeling new instances, the two word clouds should be similar and most words in them should have the same color (Fig. 6).

Labeling with Active Learning

Fig. 6. This is the last page of the Guided Labeling application. The user can export the model, its predictions, and the labels that were assigned manually. The page shows tag clouds for all documents including the term "love", taken from documents labeled by the human in the loop on the left, and from machine labeled documents on the right. Comparing the two clouds, the user can get a rough idea of how well the machine labeling process has performed.

Guided Labeling for active learning

In this article, we wanted to illustrate how active learning can be used to label a full dataset while investing only a fractional amount of time in manual labeling. The idea of active learning is that we train a machine learning model well enough to be able to delegate it to the boring and expensive task of data labeling.

We have shown the three stages involved in an active learning procedure: manual labeling, model training and evaluation, and sampling more data to be labeled. We have also shown how to implement the corresponding user interface on a web-based application, including a few tricks to speed up the manual labeling effort using uncertainty sampling.

The example used in this article referred to a sentiment analysis task with just two classes (“good” and “bad”) on movie review documents. However, it could easily be extended to other tasks by changing the number and type of classes. For example, it could be used for topic detection for text documents if we provided a topic-based ontology of possible labels (Fig. 7). It could also be extended just as simply to other data types and classification tasks.

The Guided Labeling application was developed via a KNIME workflow (Fig. 8) with the free and open source tool KNIME Analytics Platform, and it can be downloaded for free from the KNIME Hub. If you need to perform active learning and label tons of data rows, we suggest downloading the blueprint workflow and customizing it to your needs. You could, for example, make it work for images, use another machine learning model, or implement some other strategy to train the underlying model.

It is now your turn to try out the Guided Labeling application yourself. See how easily and quickly data labeling can be done!

Labeling with Active Learning

Fig. 7. Guided Labeling applied to the labeling of news articles with several topic classes

Labeling with Active Learning

Fig. 8. The KNIME workflow behind the Guided Labeling web based application. Each light gray node implements a different stage in the web based UI. It can be downloaded for free from the KNIME Hub.

As first published in Data Science Central.

Predicting the Purpose of a Drug

$
0
0
Predicting the Purpose of a Drugjulian.bunzelMon, 10/21/2019 - 10:00

Author:Julian Bunzel

Predicting the Purpose of a Drug

Keeping track of the latest developments in research is becoming increasingly difficult with all the information published on the Internet. This is why Information Extraction (IE) tasks are gaining popularity in many different domains. Reading literature and retrieving information is extremely exhausting, so why not automate it? At least a bit. Using text processing approaches to retrieve information about drugs has been an important task over the last few years and is getting more and more important1.

In a previous blog post “Fun with Tags”, we looked at how to how to train a named-entity recognition model to detect diseases in biomedical literature with KNIME Analytics Platform. This time, instead of disease names, we want to create a model that automatically detects drug names. In addition, we will go one step further and predict the purpose of those drugs detected by the trained model. This can help to get an understanding of the drugs mentioned in articles of interest and might also help in studies about drug repurposing. Has this drug lately been mentioned together with other drugs, although they have little in common? Could there be an unknown or new connection which might help to use the drug for another purpose than usual? 

Specifically, we will train a named-entity recognition (NER) model to detect drug names in biomedical literature. To do this we need a set of documents and an initial list of drug names. Since our goal is not only the recognition of these drug names but also the prediction of a drug’s purpose, we need some additional information about these drugs.

After collecting the list of drug names, we will automatically extract abstracts from PubMed. These documents will be split in two parts: one part used as our training corpus to train the model and one part for testing and validation purposes. The final model is then used to tag the whole set of documents. Based on the tagged drug names, we will create a drug-drug co-occurrence network. All of our known drugs (the drugs from our initial list) will have some additional information which can be used to predict the purpose of a drug that recognized for the first time by our model (and was not in our initial list).

The work was split into four different workflows. The entire workflow group can be downloaded from the KNIME Hub here:

  1. Gathering drug names and related articles
  2. Preprocessing, Model Training and Evaluation
  3. Create a Co-Occurrence Network and Predict Drug Purposes
  4. Extract Interesting Subgraphs

Gathering drug names and related articles

Predicting the Purpose of a Drug

Fig. 1: Workflow to parse the drug list and descriptions from the WHO website and create a corpus by using the Document Grabber to fetch articles from PubMed. The functionality is wrapped in components for better clarity. Download the Creating a Corpus workflow from the KNIME Hub here.

Dictionary creation (Drug names)

As mentioned above, our initial list of drug names should have some sort of additional information which can be used to predict the purpose of newly identified drugs. Therefore, we decided to use drugs that are covered by the Anatomical-Therapeutic-Chemical (ATC) Classification System2, which is published by the World Health Organization. It contains around 800 drug and drug combinations whereas each drug is associated to one or more ATC codes.

ATC Classification System

The ATC code itself consists of seven letters and is separated into five different levels. As an example there is acetylsalicylic acid (aspirin) with ATC codes A01AD05, B01AC06 and N02BA01. The first letter stands for one of fourteen anatomical main groups which will be used for ATC code prediction later. The succeeding two letters describe the therapeutic subgroup, followed by one letter describing the therapeutic/pharmacological subgroup. The fourth level is resembled by the fifth letter and stands for the chemical/therapeutic/pharmacological subgroup.

The last two digits then indicate the generic drug name. For example A01AD05, there is A for alimentary tract and metabolism, A01 for stomatological preparations, A01AD for other agents for local oral treatment and finally A01AD05 for the compound’s name acetylsalicylic acid. More information about the different ATC levels and meanings can be found here (https://en.wikipedia.org/wiki/Anatomical_Therapeutic_Chemical_Classification_System).

Corpus creation

In the next step, we can start to gather abstracts related to the drugs from our drug list. As a source for biomedical literature we chose the widely-known PubMed database. To retrieve articles from PubMed and put them into KNIME we can use the Document Grabber node. It fetches a certain number of articles for each provided drug name in our drug list. In this case we try to get 100 articles per drug name. 

Preprocessing, model training and evaluation

Predicting the Purpose of a Drug

Fig. 2: Workflow that describes the model training process. The first part reads the text corpus created in the first workflow and preprocesses and filters some articles. The middle part shows the model training while the third part is for evaluation. Download the workflow, Traine a NER Model, from the KNIME Hub here.

To guarantee the quality of our corpus, some preprocessing tasks are required.

At first we check, if the downloaded articles contain the query term. PubMed sometimes provides articles that are related to a drug with a similar name, but does not exactly contain the search query. Since we can’t prepare the abstracts for model training then, we filter the unrelated articles. This can be done by tagging the articles with the Wildcard Tagger  node and removing an article in case no word could be tagged. Afterwards we remove all drugs from our drug list with less than 20 remaining articles to ensure a dataset with enough sample sentences containing the drug names. This yielded a final text corpus of 44891 unique abstracts (53311 with duplicates) with 207875 annotated drug named-entities in total. 

Now, we can start to train our model, but before we do this, we partition our data into a training and a test set. We used 10% of the data for the training set (approx. 5000 articles). To train the model we use the StanfordNLP NE Learner node which currently provides 15 different parameters. Some important parameters are the useWord (set to true), useNGrams (set to true), maxNGramLength (set to 10) and noMidNGrams (set to true) parameters. They define whether to use the whole word, as well as substrings of the word as a feature, how long these substrings can be and whether the substrings can only be used as feature if they are taken from the beginning or end of the word. These things might not always be relevant, but in terms of drug names which often share similar word stems, it’s quite useful.

Another important setting is the case sensitivity option of the learner node. Since we don’t know which case is used for the words within our corpus, we choose case insensitivity, so that no matter which case is used, it is labeled by the learner node.

After training the model, we can evaluate the model by using the StanfordNLP NE Scorer. It tags the documents once by using regular expressions and once by using the trained model and compares the tags. The resulting table provides basic scores like precision, recall and counts for true and false positives/negatives. 

Predicting the Purpose of a Drug


Table 1: This table shows the number of true/false positives, false negatives as well as some basic metrics like precision, recall and f1. 

As we can see the majority of drug names could be tagged correctly. False positives are not necessarily a problem, because the model is not only for tagging known drug names from our initial drug list, but it also generalizes to find new entities. Otherwise we could have just used the Wildcard or Dictionary Tagger. However, regarding false positives, we still don’t know if the newly tagged words, are drug names at all, but we will investigate it later. 

Since the Scorer node only gives us counts and scores, we use an additional approach for evaluation which helps us to identify the words causing false positives and negatives. Basically, we do what the StanfordNLP NE Scorer node does internally. We tag the documents twice, once using the StanfordNLP NE Tagger and once using the Wildcard Tagger. Afterwards we count the number of annotations for each drug and compare the different tagging approaches. For most drugs, we can see that they were annotated at the same frequency, no matter which annotation method was used. For the example of insulin, we can see that the model sometimes just tagged insulin although there was another name component (e.g. aspart or degludec)

Predicting the Purpose of a Drug

Table 2: This table shows the number of annotations for each insulin related drug by using regex and the trained model . As we can see, the model annotated insulin more often than actually available in the literature since it failed to detect the second part. This helps to identify the amount of false positives from Table 1. 

Apart from all the measurements, we of course want to know what kind of newly identified entities there are. To get a small overview, we can use the String Matcher node to identify similarities between new words and drug names from our initial list. After doing so, we see that there are some words that are just spelling mistakes or slight variations of the drug name due to to different spellings in other countries. Some newly found names were just extensions of known drugs (e.g. insulin isophane). However, in the end we were able to detect around 750 new words whereas more than half could not be linked to a drug name from the initial list. These words would need further investigation. 

Create a co-occurrence network and predict drug purposes

Enough about training and evaluating the model. Let’s make use of the model. We can use the drug names tagged by our model to create a co-occurrence network of drug names co-occuring in the same documents. This allows us to investigate the newly found drug names in more detail and, furthermore, enables the prediction of the purpose of those newly identified drugs.. To create that network, we use the Term Co-occurrence Counter node which counts co-occurrences on sentence or document level. In this case it is enough to set it to document level, since our documents are high-level abstracts and it’s very likely that drugs being named together in an abstract are somehow related. Based on our resulting term co-occurrence table, we can create a network. 

Predicting the Purpose of a Drug

Fig. 5.: Workflow that describes the network creation process. First, we use the Network Creator node to create an empty network that can be filled with new nodes and edges by using the Object Inserter. Afterwards, we predict the ATC codes and create visual properties (color & shape) for the nodes within the network. These properties can be added by using the Feature Inserter node. After doing so, we use the Network Viewer JS (hidden in the View component) to visualize the network. Download the Co-occurence Network workflow from the KNIME Hub here.

This network can now be used to predict ATC codes of drugs. For each of our newly identified drug names, we do a majority vote, meaning that we set the ATC code that occurred most frequently in the neighborhood of an “unknown” drug. For visualisation purposes, all drugs in the network are colored based on the first level of the ATC code. Additionally, newly detected drugs are displayed as squares and known drugs as circles, respectively. This helps to evaluate and comprehend the prediction of the ATC code. As mentioned before, our initial list had around 800 drug names and the list of newly found entities contains 750 drugs. So in total there are quite some nodes in the network which makes the view pretty confusing. To avoid this, I show you how to extract relevant subgraphs to evaluate and comprehend predictions in the next section.

Extract interesting subgraphs

Predicting the Purpose of a Drug

Fig. 6: Workflow that describes the process of extracting small connected components to investigate the predictions. Download the Extracting Subgraphs workflow from the KNIME Hub here.


To investigate the predictions in detail, we can use connected components of newly detected drugs. At first, we remove all drugs from the network that are in the initial drug list to get a set of nodes in the network containing only the newly identified drugs. Afterwards, we re-add all of the previously filtered drugs that are in the first neighborhood of drugs from the component we are looking at. In the end, each connected component consists of a set of co-occurring newly detected drug names plus their neighbors from the initial network. This approach makes evaluating easier since we first filter mostly drugs from the initial drug list that tend to be connected to a huge number of drugs, but later re-add these to a smaller set of unknown drugs.

Predicting the Purpose of a Drug

Fig. 7: Connected components consisting of unknown drugs only. The color describes different types of drugs based on their predicted ATC code. Each of these components will be extended with their neighbors from the complete network to evaluate the ATC predictions. 


The following example (Fig.8) shows two of these subgraphs. The first picture is an easy case, since the four newly identified drug names only have one connection to a known drug (catumaxomab). All drugs were labeled as Antineoplastic and immunomodulating agents which is indeed correct. The second component is trickier. There are four newly detected drugs pipendoxifene, levormeloxifene, idoxifene and droloxifene. All of them were predicted as Genito-urinary system and sex hormones, since most of the known drugs in the network are in this ATC class (bazedoxifene included - it’s colored red because it has multiple ATC classes). However, there are also connections to Antineoplastic and immunomodulating agents like fulvestrant and toremifene. Connections to both of these drugs are worth mentioning as well, since the new drugs were mostly developed for breast cancer treatments. As we can see, the prediction might be right, but having a look at connections to ATC classes with a lower influence is also helpful to understand the purpose in a better way.

Predicting the Purpose of a Drug

Summary

Today, we successfully trained a named-entity recognition model to detect drug names in biomedical literature and predict the purpose of the newly identified drugs. We started with an initial set of drug names from the World Health Organization, which also provides some more information about the drug’s purpose as they are annotated using the ATC Classification System. Based on this list, we then created a text corpus of articles by fetching them from PubMed. The StanfordNLP NE nodes then helped to train a named-entity recognition model to detect not only known drug names, but also some that were not in our initial data. Finally, we built a drug co-occurrence network to predict the purpose of unknown drugs based on their neighborhood and showed how to extract interesting subgraphs to easily evaluate our predictions.

The trained model and the prediction process can now be applied to any new literature, to get an instant overview of all drugs mentioned. 

References

1. "Drug name recognition and classification in biomedical texts. A case ...."17 July 2008. Accessed 12 September 2019

2. "ATC/DDD Index - WHOCC"13 December 2018. Accessed 12 September 2019

The workflow group, Prediction of Drug Purpose, used for this blog post is available on the KNIME Hub under 08_Other_Analytics_Types/02_Chemistry_and_Life_Sciences/04_Prediction_Of_Drug_Purpose/

Fraud Detection using Random Forest, Neural Autoencoder, and Isolation Forest techniques

$
0
0
Fraud Detection using Random Forest, Neural Autoencoder, and Isolation Forest techniquesadminThu, 10/24/2019 - 10:00

Authors:Kathrin Melcher, Rosaria Silipo

    Key takeaways
    • Fraud detection techniques mostly stem from the anomaly detection branch of data science
    • If the dataset has a sufficient number of fraud examples, supervised machine learning algorithms for classification like random forest, logistic regression can be used for fraud detection
    • If the dataset has no fraud examples, we can use either the outlier detection approach using isolation forest technique or anomaly detection using the neural autoencoder
    • After the machine learning model has been trained, it's evaluated on the test set using metrics such as sensitivity and specificity, or Cohen’s Kappa

    With global credit card fraud loss on the rise, it is important for banks, as well as e-commerce companies, to be able to detect fraudulent transactions (before they are completed).

    According to the Nilson Report, a publication covering the card and mobile payment industry, global card fraud losses amounted to $22.8 billion in 2016, an increase of 4.4% over 2015. This confirms the importance of the early detection of fraud in credit card transactions.

    Fraud detection in credit card transactions is a very wide and complex field. Over the years, a number of techniques have been proposed, mostly stemming from the anomaly detection branch of data science. That said, most of these techniques can be reduced to two main scenarios depending on the available dataset:

    • Scenario 1: The dataset has a sufficient number of fraud examples.
    • Scenario 2: The dataset has no (or just a negligible number of) fraud examples.

    In the first scenario, we can deal with the problem of fraud detection by using classic machine learning or statistics-based techniques. We can train a machine learning model or calculate some probabilities for the two classes (legitimate transactions and fraudulent transactions) and apply the model to new transactions so as to estimate their legitimacy. All supervised machine learning algorithms for classification problems work here, e.g., random forest, logistic regression, etc.

    In the second scenario, we have no examples for fraudulent transactions, so we need to get a bit more creative. Since all we have are examples of legitimate transactions, we need to make them suffice. There are two options for that: We can treat fraud as an outlier or as an anomaly and use a consistent approach. Option one, for the outlier detection approach, is the isolation forest algorithm. Option two, a classic example for anomaly detection, is the neural autoencoder.

    Let’s take a look at how the different techniques can be used in practice on a real dataset. We implemented them on the fraud detection dataset from Kaggle. This dataset contains 284,807 credit card transactions, which were performed in September 2013 by European cardholders. Each transaction is represented by:

    • 28 principal components extracted from the original data
    • the time from the first transaction in the dataset
    • the amount of money

    The transactions have two labels: 1 for fraudulent and 0 for legitimate (normal) transactions. Only 492 (0.2%) transactions in the dataset are fraudulent, which is not really that many, but it may still be enough for some supervised training.

    Notice that the data contain principal components instead of the original transaction features, for privacy reasons.

    Scenario 1: supervised machine learning - random forest

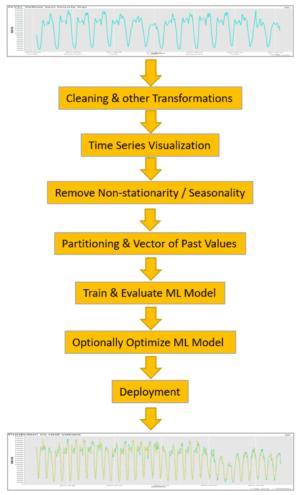
    Let’s start with the first scenario where we assume that a labeled dataset is available to train a supervised machine learning algorithm on a classification problem. Here we can follow the classical steps of a data science project: data preparation, model training, evaluation and optimization, and, finally, deployment.

    Data preparation

    Data preparation usually involves:

    • Missing value imputation, if required then by the upcoming machine learning algorithm
    • Feature selection for improved final performance
    • Additional data transformations to comply with the most recent regulations on data privacy

    However, in this case, the dataset we chose has already been cleaned, and it is ready to use; no additional data preparation is needed.

    All supervised classification algorithms need a training set to train the model and a test set to evaluate the model quality. After reading, the data therefore have to be partitioned into a training set and a test set. Common partitioning proportions vary between 80-20% and 60-40%. For our example, we adopted 70-30% partitioning, where 70% of the original data is put into the training set, and the remaining 30% is reserved as the test set for the final model evaluation.

    For classification problems like the one at hand, we need to ensure that both classes — in our case, fraudulent and legitimate transactions — are present in the training and test sets. Since one class is much less frequent than the other, stratified sampling is advised here rather than random sampling. Indeed, while random sampling might miss the samples from the least numerous class, stratified sampling guarantees that both classes are represented in the final subset according to the original class distribution.

    Model training

    Any supervised machine learning algorithm could work. For demonstration purposes, we have chosen a random forest with 100 trees, all trained up to a depth of ten levels and with a maximum of three samples per node, using the information gain ratio as a quality measure for the split criterion.

    Model evaluation: making an informed decision

    After the model has been trained, it has to be evaluated on the test set. Classic evaluation metrics can be used, such as sensitivity and specificity, or Cohen’s Kappa. All of these measures rely on the predictions provided by the model. In most data analytics tools, model predictions are produced based on the class with the highest probability, which in a binary classification problem is equivalent to using a default 0.5 threshold on one of the class probabilities.

    However, in the case of fraud detection, we might want to be more conservative regarding fraudulent transactions. This means we would rather double-check a legitimate transaction and risk bothering the customer with a potentially useless call rather than miss out on a fraudulent transaction. In this case, the threshold of acceptance for the fraudulent class is lowered — or alternatively, the threshold of acceptance for the legitimate class is increased. For this case study, we adopted a decision threshold of 0.3 on the probability of the fraudulent class and compared the results with what we obtained with the default threshold of 0.5.

    In the figure below, you can see the confusion matrices obtained using a decision threshold of 0.5 (on the left) and 0.3 (on the right), leading respectively to Cohen’s Kappa of 0.890 and 0.898 on an undersampled dataset with the same number of legitimate and fraudulent transactions. As you can see from the confusion matrices, privileging the decision toward fraudulent transactions produces a few additional legitimate transactions mistaken as fraudulent as the price to pay for more fraudulent transactions correctly identified.

    Fraud Detection using Random Forest

    Fig. 1. Shows the performance measure of the random forest using two different thresholds: 0.5 on the left and 0.3 on the right. In the confusion matrix, class 0 refers to the legitimate transactions and class 1 to the fraudulent transactions. The confusion matrices show six more fraudulent transactions correctly classified using a lower threshold of 0.3.

    Hyperparameter optimization

    To complete the training cycle, the model parameters could be optimized — as for all classification solutions. We have omitted this part in this case study, but it could easily be introduced. For a random forest, this means finding the optimal number of trees and tree depth for the best classification performance (D. Goldmann, "Stuck in the Nine Circles of Hell? Try Parameter Optimization and a Cup of Tea," KNIME Blog, 2018; Hyperparameter optimization). In addition, the prediction threshold could also be optimized.

    The workflow we used for training is therefore a very simple one with just a few nodes (Fig. 2): reading, partitioning, random forest training, random forest prediction generation, threshold application, and performance scoring. The workflow Fraud Detection: Model Training is available for free and can be downloaded from the KNIME Hub.

    Fraud Detection using Random Forest

    Fig. 2. This workflow reads the dataset and partitions it into a training and a test set. Next, it uses the training set to train a random forest, applies the trained model to the test set, and evaluates the model performance for the thresholds 0.3 and 0.5.

    Deployment

    Finally, when the model performance is acceptable by our standards, we can use it in production on real-world data.

    The deployment workflow (Fig. 3) imports the trained model, reads one new transaction at a time, and applies the model to the input transaction and the custom threshold to the final prediction. In the event that a transaction is classified as fraudulent, an email is sent to the credit card owner to confirm the transaction’s legitimacy.

    Fraud Detection using Random Forest

    Fig. 3. Shows the deployment workflow that reads the trained model, one new transaction at a time. It then applies the model to the input data, the defined threshold to the prediction probabilities, and sends an email to the credit card owner in case a transaction has been classified as fraudulent.

    Scenario 2: anomaly detection using autoencoder

    Let’s now move on to the second scenario. The fraudulent transactions in the dataset were so few anyway that they could simply be reserved for testing and completely omitted from the training phase.

    One of the approaches that we have proposed stems from anomaly detection techniques. Anomaly detection techniques are often used to detect any exceptional or unexpected event in the data, be it a mechanical piece failure in IoT, an arrhythmic heartbeat in the ECG signal, or a fraudulent transaction in the credit card business. The complex part of anomaly detection is the absence of training examples for the anomaly class.

    A frequently used anomaly detection technique is the neural autoencoder: a neural architecture that can be trained on only one class of events and used in deployment to warn us against unexpected new events. We will describe its implementation here as an example for the anomaly detection techniques.

    The autoencoder neural architecture

    As shown below in figure 4, the autoencoder is a feed-forward backpropagation-trained neural network with as many n input units as n output units. In the middle, it has one or more hidden layers with a central bottleneck layer with h units, where h < n. The idea here is to train the neural network to reproduce the input vector x to the output vector x'.

    The autoencoder is trained using only examples from one of the two classes, in this case the class of legitimate transactions. During deployment, the autoencoder will therefore perform a reasonable job in reproducing the input x on the output layer x' when presented with a legitimate transaction and a less than optimal job when presented with a fraudulent transaction (i.e., an anomaly). This difference between x and x' can be quantified via a distance measure, e.g.,

    Fraud Detection using Random Forest

    The final decision on legitimate transaction vs. fraudulent transaction is taken using a threshold value δ on the distance d(x,x'). A transaction x is a fraud candidate according to the following anomaly detection rule:

    Fraud Detection using Random Forest
    Fraud Detection using Random Forest

    Fig. 4. Shows a possible network structure for an autoencoder. In this case, we have five input units and three hidden layers with three, two and three units respectively. The reconstructed output x’ has again five units like the input. The distance between the input x and the output x’ can be used to detect anomalies, i.e., the fraudulent transactions.

    The threshold value δ can, of course, be set conservatively to fire an alarm only for the most obvious cases of fraud or can be set less conservatively to be more sensitive toward anything out of the ordinary. Let’s see the different phases involved in this process.

    Data preparation

    The first step in this case is to isolate a subset of legitimate transactions to create the training set in order to train the network. Of all legitimate transactions in the original dataset, 90% of them were used to train and evaluate the autoencoder network and the remaining 10%, together with the remaining fraudulent transactions, to build the test set for the evaluation of the whole strategy.

    The usual data preparation steps should apply to the training set, as we discussed above. However, as we have also seen before, this dataset has already been cleaned, and it is ready to be used. No additional classic data preparation steps are necessary; the only step we need to take is a neural network custom required step: normalization of the input vectors to fall in [0,1].

    Building and training the neural autoencoder

    The autoencoder network is defined as a 30-14-7-7-30 architecture, using tanh and ReLU activation functions and activity regularizer L1 = 0.0001, as suggested in the blog post "Credit Card Fraud Detection using Autoencoders in Keras — TensorFlow for Hackers (Part VII)" by Venelin Valkov. The activity regularization parameter L1 is a sparsity constraint, which makes the network less likely to overfit the training data.

    The network is trained until the final loss values are in the range [0.070, 0.071], according to the loss function mean squared error (MSE):

    Fraud Detection using Random Forest

    where N is the batch size and n is the number of units on the output and input layer.

    The number of training epochs is set to 50, the batch size N is also set to 50, and Adam— an optimized version of the backpropagation algorithm — is chosen as the training algorithm. After training, the network is saved for deployment as a Keras file.

    Model evaluation: making an informed decision

    The value of the loss function, however, does not tell the whole story. It just tells us how well the network is able to reproduce "normal" input data onto the output layer. To get a full picture of how well this approach performs in detecting fraudulent transactions, we need to apply the anomaly detection rule mentioned above to the test data, including the few frauds.

    In order to do this, we need to define the threshold δ for the fraud alert rule. A good starting point for the threshold comes from the final value of the loss function at the end of the learning phase. We used δ = 0.009, but as mentioned earlier, this is a parameter that could be adapted depending on how conservative we want our network to be.

    Fraud Detection using Random Forest

    Fig. 5. Shows the network and distance-based rule performance on the test set made of 10% of the legitimate transactions and all of the fraudulent transactions.

    The final workflow — building the autoencoder neural network, partitioning the data into training and test set, normalizing the data before feeding them into the network, training the network, applying the network to the test data, calculating the distance d(x,x'), applying the threshold δ, and finally scoring the results — is shown in figure 6 and is available for download on the KNIME Hub at Keras Autoencoder for Fraud Detection Training.

    Fraud Detection using Random Forest

    Fig. 6. This workflow reads the credit card.csv dataset and creates a training set, using 90% of all legitimate transactions only, and a test set using the remaining 10% of legitimate transactions and all of the fraudulent transactions. The autoencoder network is defined in the upper left part of the workflow. After data normalization, the autoencoder is trained and its performance is evaluated.

    Deployment

    We've now reached the deployment phase. In the deployment application, the trained autoencoder is read and applied to the new normalized incoming data, the distance between input vector and output vector is calculated, and the threshold is applied. If the distance is below the threshold, the incoming transaction is classified as legitimate, otherwise as fraudulent.

    Notice that the network plus threshold strategy has been deployed within a REST application, accepting input data from the REST Request and producing the predictions in the REST Response.

    The workflow implementing the deployment is shown in figure 7 and can be downloaded from the KNIME Hub at Keras Autoencoder for Fraud Detection Deployment.

    Fraud Detection using Random Forest

    Fig. 7. Execution of this workflow can be triggered via REST from any application by sending a new transaction in the REST Request structure. The workflow then reads and applies the model to the incoming data and sends back the corresponding prediction, either 0 for legitimate or 1 for fraudulent transaction.

    Outlier detection: isolation forest

    Another group of strategies for fraud detection — in the absence of enough fraud examples — relies on techniques for outlier detection. Among all of the many available outlier detection techniques, we propose the isolation forest technique (M. Widmann and M. Heine, "Four Techniques for Outlier Detection," KNIME Blog, 2019).

    The basic idea of the isolation forest algorithm is that an outlier can be isolated with less random splits than a sample belonging to a regular class, as outliers are less frequent than regular observations and have values outside of the dataset statistics.

    Following this idea, the isolation forest algorithm randomly selects a feature and randomly selects a value in the range of this feature as the split value. Using this partitioning step recursively generates a tree. The number of required random splits (the isolation number) to isolate a sample is the tree depth. The isolation number (often also called the mean length), averaged over a forest of such random trees, is a measure of normality and our decision function to identify outliers. Random partitioning produces noticeably shorter tree depths for outliers and longer tree depths for other data samples. Hence, when a forest of random trees collectively produces shorter path lengths for a particular data point, this is likely to be an outlier.

    Data preparation

    Again, the data preparation steps are the same as mentioned above: missing value imputation, feature selection, and additional data transformations to comply with the most recent regulations on data privacy. As this dataset has already been cleaned, it is ready to be used. No additional classic data preparation steps are necessary. The training and test sets are created in the same way as in the autoencoder example.

    Training and applying isolation forest

    Thus, an isolation forest with 100 trees and a maximum tree depth of eight is trained, and the average isolation number for each transaction across the trees in the forest is calculated.

    Model evaluation: making an informed decision

    Remember, the average isolation number for outliers is smaller than for other data points. We adopted a decision threshold δ=6. Therefore, a transaction is defined as a fraud candidate if the average isolation number lies below that threshold. As in the other two examples, this threshold is a parameter that can be optimized, depending on how sensitive we want the model to be.


    Performances for this approach on the test set are shown in Fig. 8. The final workflow, available on the KNIME Hub here, is shown in Fig. 9.

    Fraud Detection using Random Forest

    Fig. 8. Performance measures for the isolation forest on the same test set as for the autoencoder solution, including the confusion matrix and the Cohen’ Kappa. Again, 0 represents the class of legitimate transactions and 1 the class of fraudulent transactions.

    Fraud Detection using Random Forest

    Fig. 9. The workflow reads the credit card.csv dataset, creates the training and test sets, and transforms them into H2O Frame. Next, it trains an isolation forest and applies the trained model to the test set to find outliers based on the isolation number of each transaction.

    Deployment

    The deployment application here reads the isolation forest model and applies it to the new incoming data. Based on the threshold defined during training and applied to the isolation number value, the incoming data point is identified as either a candidate fraud transaction or a legitimate transaction.

    Fraud Detection using Random Forest

    Fig. 10. The deployment workflow reads a new transaction and applies the trained isolation forest to this new transaction. The isolation number is calculated for each input transaction and decides whether a transaction is fraudulent. In case of fraudulent transactions, the workflow sends an email to the owner of the credit card.

    Summary

    As described at the beginning of this tutorial, fraud detection is a wide area of investigation in the field of data science. We have portrayed two possible scenarios depending on the available dataset: a dataset with data points for both classes of legitimate and fraudulent transactions and a dataset with either no examples or only a negligible number of examples for the fraud class.

    For the first scenario, we suggested a classic approach based on a supervised machine learning algorithm, following all the classic steps in a data science project as described in the CRISP-DM process. This is the recommended way to proceed. In this case study, we implemented an example based on a random forest classifier.

    Sometimes, due to the nature of the problem, no example for the class of fraudulent transactions is available. In these cases, less accurate approaches which are nevertheless still feasible become appealing. For this second scenario, we have described two different approaches: the neural autoencoder from the anomaly detection techniques and the isolation forest from the outlier detection techniques. As in our example, often both of them are not as accurate as the random forest, but in some cases, we have no other possible approach to use.

    The three approaches proposed here are surely not the only ones that can be found in literature. However, we believe that they are representative of the three commonly used groups of solutions for the fraud detection problem.

    Notice that the last two approaches were discussed for cases in which labeled fraud transactions are not available. These are kind of emergency approaches, to be used when the classic approach for classification cannot be applied for lack of labeled data in the fraud class. We recommend using a supervised classification algorithm whenever possible. However, when no fraud data is available, one of the last two approaches could be of help. Indeed, while being prone to produce false positives, they are in some cases the only possible ways to deal with the problem of fraud detection.

    As first published in InfoQ.

    Five Tips & Tricks from the Help us Help you with KNIME Survey

    $
    0
    0
    Five Tips & Tricks from the Help us Help you with KNIME SurveyadminMon, 10/28/2019 - 10:00

    Authors:Ana Vedoveli and Iris Adä (KNIME)

    At the beginning of this year, we sent out a “Help us to Help you with KNIME” survey to the KNIME community. The idea behind the questionnaire was to listen to what the KNIME community wanted and incorporate some of those suggestions into the next releases. There were a few questions about how people are using KNIME Analytics Platform, and also questions designed to help us understand what kinds of new nodes and features people dream about. We additionally promised that we would select one dedicated node - the node most mentioned - and make sure that it would be part of our next major release.

    In this post we present this "community node" and we've also put together five tips & tricks garnered from other answers given in the survey.

    So, the node most requested by the community is [drum roll] the Duplicate Row Filter! And it was implemented in KNIME Analytics Platform 4.0 (you'll find a full list of the features released in 4.0 here). We're sure you've already noticed this node's new existence in the node repository and have played around with it already.

    KNIME Survey Help Us Help You

    Introducing: Duplicate Row Filter

    Category: Manipulator

    Feature: Easily detects duplicate rows

    Extension: KNIME Core

    With the Duplicate Row Filter, you can detect duplicate rows and decide what you would want to do with them: you can remove duplicates based on a selected criteria, or you can select a flag method. For instance, the user can select if she wants to flag a row as unique, duplicate or as the chosen duplicate to keep. She can also choose to create a column listing which rows are duplicates while also indicating which rows they duplicate. Or she can simply remove some of the duplicate rows and keep the others. To select which rows to keep, the Duplicate Row Filter allows the user to select a row-keeping criteria: now it is easier to select which row to keep based on the minimum or maximum value of a feature, or based on the order of appearance of the duplicate row.

    You can try out the Duplicate Row Filter node yourself in this example workflow, which can be downloaded from the KNIME Hub here.

    KNIME Survey Help Us Help You

    Fig. 1. The workflow demonstrating how the Duplicate Row Filter works. It's available on the KNIME Hub here.

    The nice thing about the survey is that we have found out a lot about what people want and wish for in KNIME. We have kept everyone’s suggestions and these will be taken into consideration when planning new features so there are chances you will see your suggestions implemented in future versions of KNIME. 

    The survey not only gave us new ideas for nodes and features -- but also insights on some important tips and tricks we could share with you, to help you do what you want to do in KNIME. So here are some answers to some of the questions you sent us, which can already be solved using KNIME.

    I'd like to be able to perform multiple string manipulations and mathematical operations in a single node. Is that possible? 

    KNIME Survey Help Us Help You

    Introducing: Column Expressions node

    Category: Manipulator

    Feature: Adds or replaces columns with custom expressions. And its streamable

    Extension: KNIME Expressions

    Did you know that the Column Expressions node allows you to perform multiple operations in different columns? This node lets you add or replace columns with custom expressions, which can mix string manipulation, math formulas, as well as your own set of rules with if-else statements using JavaScript! There is no limit on how simple or complex the statements can be. If you are curious about this node and want to know more, there is more information about it in this video on KNIME TV.

    I still haven't found what I'm looking for. Why I can’t find the node I want in the node repository?

    KNIME Survey Help Us Help You

    Introducing: KNIME Hub

    Category: Collaboration

    Feature: The place to find find and collaborate on KNIME workflows and nodes.

    Have you ever wondered why you can’t see that node everyone is talking about in your node repository? Well, maybe it's part of a KNIME Extension you haven't installed yet. Installing KNIME Extensions is a simple process. Go to File > Install KNIME Extensions and select the desired extension by checking its name on the list. The screenshots below show the process for installing the KNIME Expressions extension. This is the extension that includes the Column Expressions node. Here we typed “expressions” into the search field, meaning that every type of extension including the word "expressions" is listed. You then click the extension(s) you want and click “next” until the installation starts. Don't forget that for your changes to take place, you need to restart KNIME. The section on the website "Install Extensions and Integrations" provides a lot more information about this topic.

    KNIME Survey Help Us Help You

    A new alternative for installing KNIME extensions is now provided by the KNIME Hub. You can just search for the desired extension in the KNIME Hub, select it, and then drag-and-drop it into your KNIME workbench to install it. The whole procedure can be seen in the gif. Yes, it is easy as that!

    KNIME Survey Help Us Help You

    Fig. 2. Installing extensions directly from the KNIME Hub

    I'd like to append an Excel sheet to an Excel file using KNIME. Can I?

    Introducing: Excel Sheet Appender node

    Category: Sink (Writer)

    Feature: Not only reads and creates Excel files but modifies existing ones

    Extensions: KNIME Excel Support

    KNIME not only reads Excel files and creates new Excel files, but it can also modify existing ones. Appending sheets to your excel file is an easy task in KNIME: Just try the Excel Sheet Appender node! It is a "sink" or "writer" node (the type of node that only writes data out of KNIME and that does not require any additional extension) and it works with xls, xlsx and xlsm files. In the meantime, there are also community extensions that allow you to format exported Excel sheets. You can find them on the KNIME Hub.

    Is there a helper node that suggests related nodes to use in my workflow?

    If you would like to find out new nodes that are related to nodes you are currently using, you can by benefiting from the Wisdom of the Crowd using the KNIME workflow coach! When you start KNIME for the first time, you're asked if you would like to send anonymous information about your node usage to us. This community information is then used to create a recommendation system, which computes what is the most likely node to follow another one you are using in your workflow. This is great for KNIME beginners who are still exploring all the interesting node possibilities. And it is important to remember that the information we receive is completely anonymous: it only concerns the nodes you are using (we receive no information at all about your data or identity).

    If you are already using KNIME but you are not seeing/finding the workflow coach, you can enable it by going to file > preferences > workflow coach and ticking the box that says “Node Recommendations by the community”.

    KNIME Survey Help Us Help You

    It would help my work if I could rename columns based on a dictionary. Is there a way to do this?

    KNIME Survey Help Us Help You

    Introducing: Insert Column Header node

    Category: Manipulator

    Feature: Updates column names of a table according to mapping in second dictionary table.

    Extensions: KNIME Core

    Column headers (names) can be easily converted based on a dictionary by using the Insert Column Header node! This node has two input ports: the first port should receive your data table and the second port receives the dictionary. The dictionary need to contain a column with the old column names and another column with the new names! Once this is set, you can run the node will automatically convert the column names for you.

    And that is all everyone. I hope you all enjoyed the new Duplicate Row Filter and found these tips and tricks useful. If you have any type of comments, feedback, want to share your impressions about the new Duplicate Row Filter node or which Tips and Tricks you are still looking for then join in the discussions on the Forum!

    Artificial intelligence today: What’s hype and what’s real?

    $
    0
    0
    Artificial intelligence today: What’s hype and what’s real?bertholdThu, 10/31/2019 - 10:00

    Two decades into the AI revolution, deep learning is becoming a standard part of the analytics toolkit. Here’s what it means

    By Michael Berthold, KNIME

    Pick up a magazine, scroll through the tech blogs, or simply chat with your peers at an industry conference. You’ll quickly notice that almost everything coming out of the technology world seems to have some element of artificial intelligence or machine learning to it. The way artificial intelligence is discussed, it’s starting to sound almost like propaganda. Here is the one true technology that can solve all of your needs! AI is here to save us all!

    While it’s true that we can do amazing things with AI-based techniques, we generally aren’t embodying the full meaning of the term “intelligence.” Intelligence implies a system with which humans can have a creative conversation—a system that has ideas and that can develop new ones. At issue is the terminology. “Artificial intelligence” today commonly describes the implementation of some aspects of human abilities, such as object or speech recognition, but certainly not the entire potential for human intelligence.

    Thus “artificial intelligence” is probably not the best way to describe the “new” machine learning technology we’re using today, but that train has left the station. In any case, while machine learning is not yet synonymous with machine intelligence, it certainly has become more powerful, more capable, and easier to use. AI—meaning neural networks or deep learning as well as “classic” machine learning—is finally on its way to becoming a standard part of the analytics toolkit.

    Now that we are well into the AI revolution (or rather evolution), it’s important to look at how the concept of artificial intelligence has been co-opted, why, and what it will mean in the future. Let’s dive deeper to investigate why artificial intelligence, even some slightly misconstrued version of it, has attracted the present level of attention.

    The AI promise: Why now?

    In the current hype cycle, artificial intelligence or machine learning often are depicted as relatively new technologies that have suddenly matured, only recently moving from the concept stage to integration in applications. There is a general belief that the creation of stand-alone machine learning products has happened only over the last few years. In reality, the important developments in artificial intelligence are not new. The AI of today is a continuation of advances achieved over the past couple of decades. The change, the reasons we are seeing artificial intelligence appear in so many more places, is not so much about the AI technologies themselves, but the technologies that surround them—namely, data generation and processing power.

    I won’t bore you with citing how many zettabytes of data we are going to store soon (how many zeros does a zettabyte have anyway?). We all know that our ability to generate and collect data is growing phenomenally. At the same time, we’ve seen a mind-boggling increase in available computing power. The shift from single-core processors to multi-core as well as the development and adoption of general-purpose graphics processing units (GPGPUs) provide enough power for deep learning. We don’t even need to handle compute in-house anymore. We can simply rent the processing power somewhere in the cloud.

    With so much data and plenty of compute resources, data scientists are finally in a position to use the methods developed in past decades at a totally different scale. In the 1990s, it took days to train a neural network to recognize numbers on tens of thousands of examples with handwritten digits. Today, we can train a much more complex (i.e. “deep”) neural network on tens of millions of images to recognize animals, faces, and other complex objects. And we can deploy deep learning models to automate tasks and decisions in mainstream business applications, such as detecting and forecasting the ripeness of produce or routing incoming calls.

    This may sound suspiciously like building real intelligence, but it is important to note that underneath these systems, we are simply tuning parameters of a mathematical dependency, albeit a pretty complex one. Artificial intelligence methods aren’t good at acquiring “new” knowledge; they only learn from what is presented to them. Put differently, artificial intelligence doesn’t ask “why” questions. Systems don’t operate like the children who persistently question their parents as they try to understand the world around them. The system only knows what it was fed. It will not recognize anything it was not previously made aware of.

    In other, “classic” machine learning scenarios, it’s important to know our data and have an idea about how we want that system to find patterns. For example, we know that birth year is not a useful fact about our customers, unless we convert this number to the customer’s age. We also know about the effect of seasonality. We shouldn’t expect a system to learn fashion buying patterns independently of the season. Further, we may want to inject a few other things into the system to learn on top of what it already knows. Unlike deep learning, this type of machine learning, which businesses have been using for decades, has progressed more on a steady pace.

    Recent advances in artificial intelligence have come primarily in areas where data scientists are able to mimic human recognition abilities, such as recognizing objects in images or words in acoustic signals. Learning to recognize patterns in complex signals, such as audio streams or images, is extremely powerful—powerful enough that many people wonder why we aren’t using deep learning techniques everywhere. 

    The AI promise: What now?

    Organizational leadership may be asking when they should use artificial intelligence. Well, AI-based research has made massive progress when it comes to neural networks solving problems that are related to mimicking what humans do well (object recognition and speech recognition being the two most prominent examples). Whenever one asks, “What’s a good object representation?” and can’t come up with an answer, then a deep learning model may be worth trying. However, when data scientists are able to construct a semantically rich object representation, then classic machine learning methods are probably a better choice (and yes, it’s worth investing a bit of serious thought into trying to find a good object representation).

    In the end, one simply wants to try out different techniques within the same platform and not be limited by some software vendor’s choice of methods or inability to catch up with the current progress in the field. This is why open source platforms are leaders in this market; they allow practitioners to combine current state-of-the-art technologies with the latest bleeding-edge developments.

    Moving forward, as teams become aligned in their goals and methods for using machine learning to achieve them, deep learning will become part of every data scientist’s toolbox. For many tasks, adding deep learning methods to the mix will provide great value. Think about it. We will be able to include object recognition in a system, making use of a pre-trained artificial intelligence system. We will be able to incorporate existing voice or speech recognition components because someone else has gone through the trouble of collecting and annotating enough data. But in the end, we will realize that deep learning, just like classic machine learning before it, is really just another tool to use when it makes sense.


    The AI promise: What next?

    One of the road blocks that will surface, just as it did two decades ago, is the extreme difficulty one encounters when trying to understand what artificial intelligence systems have learned and how they come up with their predictions. This may not be critical when it comes to predicting whether a customer may or may not like a particular product. But issues will arise when it comes to explaining why a system interacting with humans behaved in an unexpected way. Humans are willing to accept “human failure”—we don’t expect humans to be perfect. But we will not accept failure from an artificial intelligence system, especially if we can’t explain why it failed (and correct it).

    As we become more familiar with deep learning, we will realize—just as we did for machine learning two decades ago—that despite the complexity of the system and the volume of data on which it was trained, understanding patterns is impossible without domain knowledge. Human speech recognition works as well as it does because we can often fill in a hole by knowing the context of the current conversation.

    Today’s artificial intelligence systems don’t have that deep understanding. What we see now is shallow intelligence, the capacity to mimic isolated human recognition abilities and sometimes outperform humans on those isolated tasks. Training a system on billions of examples is just a matter of having the data and getting access to enough compute resources—not a deal-breaker anymore.

    Chances are, the usefulness of artificial intelligence will ultimately fall somewhere short of the “save the world” propaganda. Perhaps all we’ll get is an incredible tool for practitioners to use to do their jobs faster and better.

    As first published in InfoWorld.

    Deploying the Obscure Python Script: Neuro-Styling of Portrait Pictures

    $
    0
    0
    Deploying the Obscure Python Script: Neuro-Styling of Portrait PicturesadminMon, 11/04/2019 - 10:00

    Authors: Rosaria Silipo and Mykhailo Lisovyi

    Today’s style: Caravaggio or Picasso?

    While surfing on the internet a few months ago, we came across this study1, promising to train a neural network to alter any image according to your preferred painter’s style. These kinds of studies unleash your imagination (or at least ours).

    What about transforming my current portrait picture to give it a Medusa touch from the famous Caravaggio painting? Wouldn’t that colleague’s portrait look better in a more Picasso-like fashion? Or maybe the Van Gogh starry night as a background for that other dreamy colleague? A touch of Icarus blue for the most adventurous people among us? If you have just a bit of knowledge about art, the nuances that you could give to your own portrait are endless.

    The good news is that the study came with a Python script that can be downloaded and reused2.

    The bad news is that most of us do not have enough knowledge of Python to deploy the solution or adapt it to our image set. Actually, most of us do not even have enough knowledge about the algorithm itself. But it turns out that we don’t need to. We don’t need to know Python, and we don’t need to know the algorithm details to generate neuro-styled images according to a selected painting. All we actually need to do is:

    • Upload the portrait image and select the preferred style (night stars by Van Gogh, Icarus blue, Caravaggio’s Medusa, etc.).
    • Wait a bit for the magic to happen.
    • Finally, download the neuro-styled portrait image.

    This really is all the end users need to do. Details about the algorithm are unnecessary as is the full knowledge of the underlying Python script. The end user also should not need to install any additional software and should be able to interact with the application simply, through any web browser.

    Do you know the Medusa painting by Caravaggio? It’s his famous self-portrait. Notice the snakes on Medusa’s head (Fig. 1b). Fig. 1a shows a portrait of Rosaria, one of the authors of this article. What would happen if we restyled Rosaria’s portrait according to Caravaggio’s Medusa (Fig. 1c)?

    To see the result of the neuro-styling, we integrated the Python script — which neuro-styles the images — into an application that is web accessible, algorithm agnostic, script unaware, and with a UI fully tailored to the end user’s requests.

    Deploying the Obscure Python Script: Neuro-Styling of Portrait Pictures
    Deploying the Obscure Python Script: Neuro-Styling of Portrait Pictures
    Fig. 2. The three steps needed to neuro-style an image: 1) Upload image file and select art style. 2) Wait while the network figures out the neuro-styling. 3) Admire your new portrait with its artistic touch from your preferred painting.

    From a web browser on your computer, tablet or smartphone, the application starts in the most classical way by uploading the image file. Let’s upload the portrait images of both authors, Misha and Rosaria.

    After that, we are asked to select the painting style. Rosaria is a big fan of Caravaggio’s paintings, so she selected “Medusa.” Misha prefers Picasso’s cubism and picked his “Portrait of Dora Maar.”

    At this point, the network starts crunching the numbers: 35 minutes on my own laptop3 using just my CPU; 35 seconds on a more powerful machine4 with GPU acceleration.

    Now, we land on the application’s final web page. Let’s see the restyling that the network has come up with (Figs. 3-4).

    The neuro-styled images are shown below in Figures 3 and 4. Notice that the input images are not deeply altered. They just acquire some of the colors and patterns from the art masterpieces, like Rosaria’s Medusa-style hair or the background wall in Misha’s photo. Just a disclaimer: As interesting as these pictures are, they might not be usable for your passport yet!

    Deploying the Obscure Python Script: Neuro-Styling of Portrait Pictures

    Three easy steps to get from the original image to the same image, styled by a master! No scripting and no tweaking of the underlying algorithm required. All you need to know is where the image file is located and the art style to apply. If you change your mind, you can always go back and change the painting style or the input image.

    Implementing the image neuro-styling app

    To put this application together, we needed just a few features from our tool.

    1. An integration with Python 
    2. Image processing functionalities
    3. A web deployment option

    Python integration

    The task here is to integrate the VGG19 neural network developed by the Visual Geometry Group at the University of Oxford and available in a Python script downloadable from the Keras Documentation pageii to style arbitrary portrait pictures. So, we need a Python integration.

    The integration with Python is available in the core installation5 of the open source Analytics Platform. You just need to install the Analytics Platform with its core extensions and Python with its Keras package. After both have been installed, you need to point the Analytics Platform to the Python installation via File -> Preferences -> Python page. If you are in doubt about what to do next, follow the instructions in the Python Integration Installation Guide and in the Deep Learning Integration Installation Guide.

    After installation, you should see a Python category in the Node Repository panel, covering free scripting, model training, model predictor, plots, and more Python functions (Fig. 5). All Python nodes include a syntax highlighted script editor, two buttons for script testing and debugging, a workspace monitor, and a console to display possible errors.

    Notice that a similar integration is available for R, Java and JavaScript. This whole integration landscape enables you to collaborate and share colleagues’ code and scripts, too.

    Deploying the Obscure Python Script: Neuro-Styling of Portrait Pictures

    Image Processing Extension

    The image processing functionalities are available in the Image Processing community extension. After installation, you’ll see the image processing functionalities in the Node Repository, in the category Community Nodes/Image Processing. You can use them to manipulate images, extract features, label, filter noise, manipulate dimensions, and transform the image itself.

    Web deployment option

    The web component is provided by the WebPortal. All the widget nodes, when encapsulated into components, display their graphical view as an element of a web page. The two web pages shown in Fig. 2 have been built by combining a number of widget nodes into a single component. 

    The final workflow

    The final workflow implementing the web application described above is shown in Fig. 6 and is available for download from the Hub.

    The workflow in Fig. 6 starts by reading the input portrait image and the art-style images (component named “Upload input images”). The input image is then resized, normalized and its color channels are reordered. At this point, the Python script — performing the neuro-styling as described in the Appendix and encapsulated in the component called “Style transfer in Python” — takes over and retrains the neural network with the new input image and the selected art-style. The produced image is then denormalized, and the color channels are brought back to the original order. The last node, called “Display styled images,” displays the resulting image on the final web page.

    Notice that it was not necessary to alter the Python code. A copy and paste of the original code into the Python node editor with just a few adjustments — for example, to parameterize the training settings — was sufficient.

    On an even higher level, the end users, when running the application from their web browser, will not see anything of the underlying Python script, neural network architecture, or even the training parameters. It is the perfect disguise to hide the obscure script and the algorithm’s complexity from the end user.

    Deploying the Obscure Python Script: Neuro-Styling of Portrait Pictures

    Python code as reusable component

    Now, the Python script seems to work reasonably well, and most of us who do not know Python might like to use it, too. The Python code in the “Style Transfer in Python” component worked well for us, but it is hard to recycle for others.

    To improve the reusability of the Python script by other users, we transformed this component into a template and stored it in a central location. Now, new users can just drag and drop the template to generate a linked component inside their workflow.

    Similar templates have been created for the image processing components. You can recognize the linked instances of such templates by the green arrow in the lower left corner of the gray node.

    Deploying the image neuro-styling app in one click

    The last step is deployment. In other words, how to turn our freshly developed workflow into a productive application accessible from a web browser and work on the current data.

    All we need to do is drag and drop the neuro-styling workflow from the LOCAL workspace in the Analytics Platform to a workspace. The workflow can then be called from any web browser via the WebPortal of the Server. In addition, if any widget nodes have been used, the workflow execution on the WebPortal will result in a sequence of interactive web pages and dashboards.

    Notice that this one-click deployment procedure applies to the deployment of any Python script, making it much easier to use in a productive environment.

    Summary

    With the excuse of playing around with neuro-styled portraits of Rosaria and Misha and their colleagues, we have shown how easy it is to import, integrate and deploy an obscure Python script — without needing to know Python.

    We have also shown how to configure the application to let it run from any web browser, where we ask the end user for just the minimum required information and hide all other unnecessary details.

    In order to make the Python script and other parts of the application reusable by others, we have packaged some pieces as templates and inserted them as linked components in many other different applications.

    Appendix: neuro-style transfer

    Neural style transfer is a technique that uses neural networks to extract a painting style from one image and apply it to another. It was first suggested in “A Neural Algorithm of Artistic Style i.” 

    The main idea is to make use of the fact that convolutional neural networks (CNNs)6 capture different levels of complexity in different layers. First convolutional layers can work as low-level edge detectors, while last convolutional layers can capture objects. As we are interested only in a general object detector, we do not need to train a dedicated network for the purpose of style transfer. Instead, we can use any existing pre-trained multilayer CNN. In this article, we have used the VGG19 neural network developed by the Visual Geometry Group at the University of Oxford and available in a Python script that is downloadable from the Keras Documentation pageii.

    The styling procedure is defined as an optimization of a custom function. The function has several parts:

    • One term ensures that the resulting image resembles the high-level objects in the original image. This is achieved by the difference between the input and output images, where the output image is the network response in one of the last convolutional layers.
    • The second term aims at capturing the style from the art painting. First of all, the style is represented as a correlation across channels within a layer. Next, the difference in style representation is calculated across the CNN layers, from first to last layer. 
    • The last term enforces smoothness of the resulting styled image and was advocated in “Understanding Deep Image Representations by Inverting Themv.”

    Finally, the optimization of this custom function is performed iteratively using automated differentiation functionalities provided by Keras. The custom function needs to be optimized for every new input image. That means that for every new portrait, we need to run the optimization procedure on the pre-trained CNN again.

    As first published in Dataversity.

    References

    1. L. Gatys et al., A Neural Algorithm of Artistic Style, [arXiv:1508.06576]

    2. Keras Neural Transfer Style Example, Keras Documentation Page

    3. Laptop specs: CPU Intel i7-8550U, 4 cores, with multi-threading; 16 GB RAM

    4. GPU machine specs: CPU Intel i7-6700, 4 cores, with multi-threading; 32 GB RAM; NVIDIA GeForce GTX 1080 with 8GB VRAM

    5. Aravindh Mahendran, Andrea Vedaldi, Understanding Deep Image Representations by Inverting Them, [arXiv:1412.0035]

    6. Convolutional Neural Networks video series on YouTube, Deeplearning.ao, 2017


    What Does It Take to be a Successful Data Scientist?

    $
    0
    0
    What Does It Take to be a Successful Data Scientist?bertholdWed, 11/06/2019 - 06:00

    As first published in Harvard Data Science Review.

    Abstract

    Given recent claims that data science can be fully automated or made accessible to nondata scientists through easy-to-use tools, I describe different types of data science roles within an organization. I then provide a view on the required skill sets of successful data scientists and how they can be obtained, concluding that data science requires both a profound understanding of the underlying methods as well as exhaustive experience gained from real-world data science projects. Despite some easy wins in specific areas using automation or easy-to-use tools, successful data science projects still require education and training.

    Keywords: data science, analytics, practitioner, education, insights, discovery

    Data scientists are rare, that’s not new. Lots of educational programs are popping up to train more to meet the demand. Universities are creating data science departments, centers, or even entire divisions and schools. Online universities offer courses left and right. Even commercial providers present data science certifications in just a few weeks or months (or sometimes over a weekend).

    But what is the right approach to earning your stripes and calling yourself a successful data scientist?

    Theory or practice?

    At some point in the past years, there was hope that a single, simple solution could enable everybody to become a data scientist—if we just gave them the right tools. But similar to a doctor needing to know how the human body functions, a data scientist needs to understand the state-of-the-art models and algorithms to be able to make educated choices and recommendations. We are, after all, talking about data scientists here, not just users of black boxes that were designed by successful data scientists. A doctor isn’t turning us into a doctor by telling us what medicine to take either.

    But is a theoretical education sufficient? My answer here is no. Data science is as much about knowing the tool as it is about having experience applying it to real-world problems, about having that ‘gut feeling’ that raises your eyebrows when the results are suspiciously positive (or just weird). I have seen this countless times with students in our data science classes. Early on, when aspiring data scientists start working on practical exercises, no matter how smart they are, they present results that are totally off. Once asked ‘Are you sure this makes sense?’ they realize and begin to question their results, but this is learned behavior. These are often things as simple as questioning a 98% accuracy on a credit churn benchmark. Rather than wondering if this could point to a data pollution issue (the testing data containing some information about the outcome), the student proudly presents their 25% margin over their fellow students.

    Becoming a successful data scientist requires both knowing the theory and having the experience to know how to get to, and when to trust, your results. The big question is can we teach ‘real-world experience’ during our courses as well.

    Playing is training enough?

    Many wannabe data scientists claim they gained that real-world experience from working on online data analysis challenges—Kaggle or others. But that’s only partly true because these challenges focus on a small, important, but fairly static part of the job. Some data scientist trainers have started building practical exercises, modeling some of those other real-world traps. KNIME, for instance, can be used to create data in addition to analyzing it. We use this for our own teaching courses to create real-world, look-alike databases about artificial customers with given distributions and dependencies to marital status, income, shopping behaviors, preferences, and other features. The data generation modules also allow us to inject outliers, anomalies, and other patterns that break standard analysis methods if not detected earlier. But this is still very similar to learning how to drive on a playground; it doesn’t prepare you for driving in downtown Manhattan. Somehow, we can’t prepare for real life in the privacy of our home or classroom.

    Let’s dive a bit deeper into what a data scientist actually does. Many articles have already covered the horizontal spread of activities: everything from data sourcing, blending, and transforming all the way to creating interactive, analytical applications or otherwise deploying models into production (and I am not even touching upon monitoring and continuously updating those production models). Lots of those online challenges ignore these surrounding activities and focus solely on the modeling part. But that’s not the only problem. Let’s also consider the vertical spread of tasks: Why do we need data science?

    Why data science?

    Data science is needed for different types of activities, and those require increasingly sophisticated skills and expertise from the data scientists, too.

    Novice

    This is the easiest setup that we can, at least partially, practice for in isolation. The problem and goal are well defined, the data is mostly in good shape (and exists!), and the goal is to optimize a model to provide better outcomes. Examples are tasks such as predicting churn of customers and placing online advertisements. These are projects that essentially just support and confirm what the business stakeholder knows and put this knowledge into practice.

    In order to tackle these types of problems, a data scientist needs to understand the ins and outs of models and algorithms and must be able to adjust the many little knobs to optimize performance. This is a task that can be somewhat automated, and experiments show that automation can often beat a not-so-experienced data scientist when it comes to model automation on standard tasks.

    But even at this base level, our data scientist needs some experience to be able to ensure the goal is properly translated into a metric to be optimized as well as the ability to ensure the data isn’t polluted. Classic examples of junior mistakes are using an optimization metric that ignores different costs for different types of errors or not realizing that the data used for training isn’t unbiased (e.g., training your model on existing customers isn’t a good basis for making recommendations about whether someone completely new may or may not be a good customer).

    Apprentice

    In reality, this job is usually much less well-defined. The business owner knows what they want to optimize, but they don’t have a clear problem formulation, and way too often, they don’t have the right data. Stereotypical statements for this setup are project descriptions of the type ‘We have this data, please answer that question!’ Examples can range from predicting machine failures (‘We measure all those things, just tell us a day before the machine breaks.’) to predicting customer satisfaction (‘We send out a survey every month, just tell me who will cancel their contract tomorrow.’).

    Here our data scientist needs experience communicating with stakeholders and domain experts to identify the data to be collected and to find and train the right models to provide the answers to the right question. This also involves a lot of nontheoretical but practical work around data blending and transformation and ensuring proper model deployment and monitoring. In training, we can help the data scientist by providing blueprints for similar applications, but automation often fails because the data types aren’t quite covered or the model optimization routines miss the mark just a bit. This is also an issue with the maturity of the field: We haven’t yet encountered problems of all types, and many of these types of projects require a touch of creativity in their solution. An automated solution or a solution created by an inexperienced data scientist may seem to provide the right type of answer, but it will often be a long shot from providing the best possible answer.

    Expert

    The last type of data science activity is actually the truly interesting one. The goal is to create new insights that will then trigger new analytical activities and may completely change how things are done in the future. Setups of this kind are often initially poorly described (‘I don’t know what the solution looks like, but I’ll know it when I see it!’), and the data scientist’s job is to support this type of explorative hypothesis generation. In the past, we were restricted to simple, interactive data visualization environments, but today, an experienced data scientist can help to quickly try out different types of pattern discovery algorithms or predictive models and refine that setup given user feedback. Typically a lot of this feedback will be of the type ‘We know this’ or ‘We don’t care about that,’ which will lead to continued refinement. The true breakthrough, however, is often initiated by comments of the type ‘This is weird, I wonder …,’ triggering a new hypothesis about underlying dependencies.

    For this type of activity, our data scientist needs experience dealing with open-ended—often research type—questions and the ability to quickly iterate over different types of analysis methods and models. It requires out-of-the-box thinking and the ability to move beyond an existing blueprint, and, of course, it requires learning from past experiences. In this type of scenario, often the type of insights generated yesterday aren’t interesting today because the past insights did advance and change the knowledge of both the data scientist and the domain expert!

    Presumably, this segmentation is a bit blurry; some apprentices will never aspire to become an expert, having job requirements that are well-defined and can be solved using standard techniques. And obviously, this will change over time with the data science field maturing. From what we see at KNIME (our built-in recommendation engine relies on anonymous tool usage information), the famous 90-9-1 doesn’t quite apply here, but it is still only a fairly small percentage of our users (<10%) that regularly use nodes that we’d refer to as expert modules. The vast majority of our users start with one of the example workflows (which, in turn, rely on expert nodes) or use relatively standard modules themselves. This is also a view validated by conversations with our larger customers: Many of the users there rely on workflows as templates to start from instead of creating complex workflows from scratch.

    Where to?

    Data science, like computer science, requires a mix of theory and practice. Similar to how we now run software projects as part of most computer science curriculum, we should add practical projects to data science curricula. But like successful programmers, successful data scientists will require years of practical, real-world experience before being able to tackle real problems independently.

    For some of the easier tasks, we can put junior data scientists to work or potentially even automate (parts of) the process. But for the truly interesting discipline of data science—the one that helps us advance our knowledge and understanding of how things work—we require true master data scientists with deep theoretical understanding, lots of experience, and the ability to think beyond the obvious.

    Build your CV based on LinkedIn profile with BIRT in KNIME

    $
    0
    0
    Build your CV based on LinkedIn profile with BIRT in KNIMEarmingruddMon, 11/11/2019 - 10:00

    Author: Armin Ghassemi Rudd (Data Scientist & Consultant)

    Are you trying to build an attractive CV? Maybe you’ve been searching the web for online CV builders? Using these online CV builders, you have to fill out a form and enter your information like name, contact information, skills, experiences, and so on. There are a few online CV builders that ease the job for you and ask for permission to access your LinkedIn profile and read your information. They are great tools for sure, but they have down points as well.

    • Not all of them are free, especially the nice ones
    • They are not fully customizable
    • Often ads are inserted in the CV, especially the free ones. This makes the CV look unprofessional
    • If you care about your privacy, then remember that you are giving these tools permission to read and store your information

    Here I’d like to share an alternative solution with you, which is entirely free, customizable, ad-free, and safe.

    KNIME Analytics Platform integrates with BIRT, which is an open-source reporting tool. Using this great tool, we can build completely customized reports. You can add or remove any report items as you wish to build a report based on the data you have imported.

    Using BIRT in KNIME, I’ve built a workflow to read my LinkedIn profile data and export a very nice CV. Below is an example CV based on this LinkedIn profile.

    Build your CB based on LinkedIn profile

    In this blog article I want to show you how you can download the workflow that builds your CV and explain the instructions inside the workflow annotations. If you want to look up a more comprehensive description of the instructions and also find out how to build this workflow from scratch, you can follow links to a tutorial on my statinfer account: Building a CV Builder with BIRT in KNIME - Part 1 and Part 2.

    Downloading LinkedIn data

    Before you get started building your CV in KNIME, you need to download your LinkedIn profile data. To do that, you request a copy of your data on the LinkedIn website:

    Login in to your LinkedIn account; in the top bar, click on your image; this causes a drop-down list to  appear; select “Settings & Privacy”:

    CV builder from LinkedIn profile

    Now, in the “Privacy” tab, go to the “How LinkedIn uses your data” section and select “Getting a copy of your data”:

    CV builder from LinkedIn profile

    From the options that appear, select the first one, which lets you “download larger data archive” and click the “Request archive” button.

    CV builder from LinkedIn profile

    A basic version of your data will be ready within the next 10 minutes. The complete version will be available for download in about 24 hours. If you want to have the “Top 5 Skills” chart like the example CV in this post, you need to wait for the complete version since the basic version does not contain the endorsements.

    Preparing data to be read by KNIME

    After downloading the data, unzip the downloaded file and rename the folder to “LinkedInDataExport”.

    In the “Education.csv” file, add a new column named “Field of study” right after the “Degree Name” column and add your field of study to each record.

    You might want to edit some information in the files – if you do, be sure to keep the table structure the same.

    Saving the CV_Builder workflow

    Download the CV_Builder workflow from the KNIME Hub and open it in KNIME. Then go to the “File” tab and select “Save as…”, then choose your local workspace and press OK.

    Moving LinkedIn data to the workflow directory

    Now, move the downloaded LinkedIn data folder “LinkedInDataExport” to the folder named “data” under the workflow directory (CV_Builder) in your workspace.

    Replace the current folder “LinkedInDataExport” which contains the example data files. You also have to replace the image file inside the “data” folder named “personal_photo.png” with your photo with the same file name and dimensions (496*516) (otherwise you might need to edit the image item in BIRT).

    The “CV_Builder” workflow

    Now, edit your phone number in the configuration window of the "String Input" node in the “Profile” metanode, then execute, and save the workflow. Your CV is now essentially ready. If you want to make any modifications to how it looks, with BIRT you can modify any section as you wish (optional) and export your CV by clicking the “View Report” icon (arrow) and selecting the export type from the drop-down list.

    CV builder from LinkedIn profile
    CV builder from LinkedIn profile

    Further reading

    If you would like to learn how to build this CV Builder from scratch with BIRT in KNIME, continue reading my tutorial Building a CV Builder with BIRT in KNIME.

    Download the CV Builder workflow from the KNIME Hub.

    About the author

    As you can also see from Armin's CV he built with his CV Builder, Armin is a Data Scientist Instructor and Consultant. He completed his master's degree in the field of IT Management and Business Intelligence at the University of Tehran. He is a data science enthusiast and enjoys playing with data and making sense of it.

    He is also a very active contributor to the KNIME Forum. Thank you Armin! You can find him there as armingrudd.

    The 80/20 Challenge: From Classic to Innovative Data Science Projects

    $
    0
    0
    The 80/20 Challenge: From Classic to Innovative Data Science ProjectsadminThu, 11/14/2019 - 10:00

    Author: Rosaria Silipo (KNIME)

    As first published in Dataversity

    Sometimes when you talk to data scientists, you get this vibe as if you’re talking to priests of an ancient religion. Obscure formulas, complex algorithms, a slang for the initiated, and on top of that, some new required script. If you get these vibes for all projects, you are probably talking to the wrong data scientists.

    Classic data science projects

    A relatively large number (I would say around 80%) of Data Science projects are actually quite standard, following the CRISP-DM process closely, step by step. Those are what I call classic projects.

    Churn prediction

    Training a machine learning model to predict customer churn is one of the oldest tasks in data analytics. It has been implemented many times on many different types of data, and it is relatively straightforward.

    We start by reading the data (as always), which is followed by some data transformation operations, handled by the yellow nodes in Fig. 1. After extracting a subset of data for training, we then train a machine learning model to associate a churn probability with each customer description. In Fig. 1, we used a decision tree, but of course, it could be any machine learning model that can deal with classification problems. The model is then tested on a different subset of data, and if the accuracy metrics are satisfactory, it is stored in a file. The same model is then applied to the production data in the deployment workflow (Fig. 2).

    The 80/20 Challenge: From Classic to Innovative Data Science Projects
    Fig. 1: Training and evaluating a decision tree to predict churn probability of customers
    The 80/20 Challenge: From Classic to Innovative Data Science Projects
    Fig. 2: Deploying a previously trained decision tree onto productive customer data

    Demand prediction

    Demand prediction is another classic task, this time involving time series analysis techniques. Whether we’re talking about customers, taxis or kilowatts, predicting the required amount for some point in time is a frequently required task. There are many classic standard solutions for this.

    In a solution for a demand prediction problem, after reading and preprocessing the data, a vector of past N values is created for each data sample. Using the past N values as the input vector, a machine learning model is trained to predict the current numerical value from the past N numerical values. The error of the machine learning model on the numerical prediction is calculated on a test set, and if acceptable, the model is saved in a file.

    An example of such a solution is shown in Fig. 3. Here, a random forest of regression trees is trained on a taxi demand prediction problem. It follows pretty much the same steps as the workflow used to train a model for churn prediction (Fig. 1). The only differences are the vector of past samples, the numerical prediction, and the full execution on a Spark platform. In the deployment workflow, the model is read and applied to the number of taxis used in the past N hours in New York City to predict the number of taxis needed at a particular time (Fig. 4).

    The 80/20 Challenge: From Classic to Innovative Data Science Projects
    Fig. 3: Training and evaluating a random forest of regression trees to predict the current number of taxis needed from the past N numbers in the time series
    The 80/20 Challenge: From Classic to Innovative Data Science Projects
    Fig. 4: Applying a previously trained random forest of regression trees to the vector of numbers of taxis in the past N hours to predict the number of taxis that will be needed in the next hour

    Most of the classic Data Science projects follow a similar process, either using supervised algorithms for classification problems or time series analysis techniques for numerical predictive problems. Depending on the field of application, these classic projects make up a big slice of a data scientist’s work.

    Automating model training for classic data science projects

    Now, if a good part of the projects I work on are so classic and standard, do I really need to reimplement them from scratch? I should not. Whenever I can, I should rely on available examples or, even better, blueprint workflows to jump-start my new data analytics project. The KNIME Hub, for example, is a great source.

    Let’s suppose we’ve been assigned a project on fraud detection. The first thing to do, then, is to go to the Workflow Hub and search for an example on “fraud detection.” The top two results of the search show two different approaches to the problem. The first solution operates on a labeled dataset covering the two classes: legitimate transactions and fraudulent transactions. The second solution trains a neural autoencoder on a dataset of legitimate transactions only and subsequently applies a threshold on a distance measure to identify cases of possible fraud.

    According to the data we have, one of the two examples would be the most suitable one. So, we can download it and customize it to our particular data and business case. This is much easier than starting a new workflow from scratch.

    The 80/20 Challenge: From Classic to Innovative Data Science Projects
    Fig. 5. Top two results on the KNIME Hub after a search for “fraud detection”

    Again, if these applications are so classic and the steps always the same, couldn’t I use a framework (always the same) to run them automatically? This is possible! And especially so for the simplest data analysis solutions. There are a number of tools out there for guided automation. Let’s search the Workflow Hub again. We find a workflow called “Guided Automation,” which seems to be a blueprint for a web-based automated application to train machine learning models for simple data analysis problems.

    Actually, this “Guided Automation” blueprint workflow also includes a small degree of human interaction. While for simple, standard problems a fully automated solution might be possible, for more complex problems, some human interaction is needed to steer the solution in the right direction.

    The 80/20 Challenge: From Classic to Innovative Data Science Projects
    Fig. 6. Sequence of web pages in a guided automation solution: 1. Upload dataset 2. Select target variable 3. Filter out uninformative columns 4. Select the machine learning models you want to train 5. Select the execution platform 6. Display accuracy and speed results (not shown here)

    More innovative data science projects

    Now for the remaining part of a data scientist’s projects — which in my experience amount to approximately 20% of the projects I work on. While most of the data analytics projects are somewhat standard, there is a relatively large amount of new, more innovative projects. Those are usually special projects, neither classic nor standard, covering the investigation of a new task, the exploration of a new type of data, or the implementation of a new technique. For this kind of project, you often need to be open in defining the task, knowledgeable in the latest techniques, and creative in the proposed solutions. With so much new material, it is unlikely that examples or blueprints can be found on some repository. There is really not enough history to back them up.

    Machine learning for creativity

    One of the most recent projects I worked on was aimed at the generation of free text in some particular style and language. The idea is to use machine learning for a more creative task than the usual classification or prediction problem. In this case, the goal was to create new names for a new line of outdoor clothing products. This is traditionally a marketing task, which requires a number of long brainstorming meetings to come up with a list of 10, maybe 20, possible candidates. Since we are talking about outdoor clothing, it was decided that the names should be reminiscent of mountains. At the time, we were not aware of any targeted solution. The closest one seemed to be a free text generation neural network based on LSTM units.

    We collected the names of all the mountains around the world. We used the names to train an LSTM-based neural network to generate a sequence of characters, where the next character was predicted based on the current character. The result is a list of artificial names, vaguely reminiscent of real mountains and copyright-free. Indeed, the artificial generation guarantees against copyright infringement, and the vague reminiscence of real mountain names appeals to fans of outdoor life. In addition, with this neural network, we could generate hundreds of such names in only a few minutes. We just needed one initial arbitrary character to trigger the sequence generation.

    The 80/20 Challenge: From Classic to Innovative Data Science Projects
    Fig. 7: Neural network with a hidden layer of LSTM units for free text generation

    This network can be easily extended. If we expand the sequence of input vectors from one past character to many past characters, we can generate more complex texts than just names. If we change the training set from mountain names to let’s say rap songs, Shakespeare’s tragedies, or foreign language texts, the network will produce free texts in the form of rap songs, Shakespearean poetry, or texts in the selected foreign language, respectively.


    Classic and innovative data science projects

    When you talk to data scientists, keep in mind that not all Data Science projects have been created equally.

    Some Data Science projects require a standard and classic solution. Examples and blueprints for this kind of solution can be found in a number of free repositories, e.g., the Workflow Hub. Easy solutions can even be fully automated, while more complex solutions can be partially automated with just a few human touches added where needed.

    A smaller but important part of a data scientist’s work, however, consists of implementing more innovative solutions and requires a good dose of creativity and up-to-date knowledge on the latest algorithms. These solutions cannot really be fully or maybe even partially automated since the problem is new and requires a few trial runs before reaching the final state. Due to their novelty, there might not be a few previously developed solutions that could be used as blueprints. Thus, the best way forward here is to readapt a similar solution from another application field.

    Data Anonymization in KNIME. A Redfield Privacy Extension Walkthrough

    $
    0
    0
    Data Anonymization in KNIME. A Redfield Privacy Extension WalkthroughRedfieldMon, 11/18/2019 - 10:00

    Anonymization is a hot topic of discussion. We are generating and collecting huge amounts of data, more than ever before. A lot of this data is personal and needs to be handled sensitively. In recent times, we’ve also seen the introduction of the GDPR stipulating that only anonymized data may be used extensively and without privacy restrictions.

    More privacy topics?

    For a number of years, we have been working with anonymization using KNIME. In this blog we would like to share the nodes we’ve developed with the community. These nodes help address privacy requirements. For the purposes of this article, we assume you are familiar with various anonymization techniques and terms. Our walkthrough of the Privacy extension is based on this example workflow, which you can download for free from the KNIME Hub.

    Why are these anonymization nodes important? Lack of proper anonymization or pseudonymization introduces risks and, if there is a data breach, huge penalties are applied for non-GDPR compliance. Even if you think you have analyzed your data and believe it to be anonymized, our assessment node can measure the risks. Simple anonymization is not enough.

    In this article, we’d like to:

    • Demonstrate how to work with the new Privacy Extension for KNIME, which utilizes advanced anonymization techniques
    • Provide concrete examples of personal data anonymization and assess the risks de-anonymization. 

    The FIFA 19 dataset

    The reference data we use is from the computer game FIFA 19. It contains “personal” data about real football players - their names, physical parameters, ages, salaries, clubs, positions and some in-game parameters.

    Introducing the nodes in the Privacy Extension

    Our Privacy Extension contains three different node types, which handle these areas: basic anonymization, hierarchical anonymization, and assessment node.

    1. Anonymization node - applies hashing (SHA-1) with salting to the selected columns. There are four salting modes:

    • None: the selected values are hashed as they are, no additional concatenation is used
    • Random: random seed is used for salting every time node is executed. A fixed seed value can be used
    • Column: values from additional columns are used for salting. Values from selected columns are concatenated row-wise
    • Timestamp: the selected date and time is used for salting. Selected Date&Time is concatenated to the values. It is possible to use workflow execution time.

    2. Hierarchical nodes apply a technique to generalize the quasi-identifying attributes. These nodes utilize a powerful anonymization Java library, called ARX.

    • Create Hierarchy node: builds the hierarchies used in the Anonymization node. There are four types of hierarchies, their selection depends on the data type of the attribute and the way the user would like to anonymize the data: date-based, interval-based, order-based and masking-based
    • Hierarchy Reader node: has two functions - reads the binary file of hierarchy and/or updates the hierarchy to fit the input dataset
    • Hierarchy Writer node: writes the created or updated hierarchies to the disk as binary files
    • Hierarchical Anonymization node: applies the hierarchy input, utilizes the capabilities of ARX library, and anonymizes data according to five currently available models. In most cases, hierarchy files are necessary for anonymization. These files can be fed to a special ARX Hierarchy Anonymization port or could be read by the node

    3. Anonymity Assessment node: estimates two type re-identification of risks: quasi-identifiers diversity and attacker models.

    • The first type of risk assessment includes calculation of distinction and separation metrics for the quasi-identifying attributes.
    • The second type of risk assessment estimates three classical types of attacks (http://dx.doi.org/10.6028/NIST.IR.8053): the prosecutor, the journalist and the marketer.

    The output table contains the probabilities of re-identifying the records in the input table. This node has second optional input port, that allows the user to compare data before and after anonymization.

    You can read more about ARX capabilities in one of the papers of the creator of the library Dr. Fabian Prasser.

    Concept

    To better understand this article and our example workflow you need to know some of the concepts behind the methods used for anonymization.

    Attribute types

    ARX defines four attribute types and we apply the same definitions:

    • Identifying attributes identify a person precisely, e.g. name, surname, address, social security number.
    • Quasi-identifying attributes identify a person in a dataset indirectly e.g.the attacker could identify a person if additional information is available in the dataset, e.g. age, date of birth, gender, zip code.
    • Sensitive attributes contain information that is not referred to identifying, however it will be exposed, and should not be able to be matched to a specific person, e.g. medical diagnoses, sexual orientation, religious views.
    • Non-sensitive attributes do not refer to any of the types described above, but can be useful for data analysis.

    Forms of data transformation

    In the following example we are going to utilize our Privacy Extension for data anonymization. To do so, we have to build two hierarchies that are necessary for hierarchical anonymization methods provided by ARX. We will read and update the hierarchies that were created before to make them fit the current dataset, save all the used hierarchies, and finally compare the risks of de-anonymization for the original and the anonymized dataset.

    The idea behind data anonymization is to: transform the data such that afterwards it will be impossible or hard to re-identify the persons who present in the dataset. There are many ways to transform data and hide information, however in this extension we use these four:

    • Suppression - entire removal of values in specific columns. Usually used for deleting identifying information - name, surname, address.
    • Character masking - partial modification of values with non-meaningful characters (e.g. “x” or “*”). Can be applied to hide quasi-identifying attributes - zip code, IP, phone number.
    • Pseudoanonymization - replacement of values with values that do not contain any useful information. The simplest examples of this are hashing and tokenization. Pseudoanonymized data can be reversed if the reversal algorithm is known or translation table is stored. This type of transformation can be applied to almost any kind of attribute.
    • Generalization - reduction of the data quality by providing some aggregated data instead of original values. Applying functions like mean, median, mode or binning the data are examples of data generalization.

    Data anonymization models

    Data anonymization models are based on the many models available for this in the ARX library. The choice of model depends on multiple factors: sensitive attributes present in the dataset, types of attacks to prevent, size and diversity of the dataset, etc. Our Redfielfd Privacy Nodes extension has five models - this list will be extended in future releases.

    Let’s now have a look at the simplest model - k-anonymity defined as follows: “A dataset is k-anonymous if each record cannot be distinguished from at least k-1 other records regarding the quasi-identifiers. Each group of indistinguishable records in terms of quasi-identifiers forms a so-called equivalence class.”

    Risk assessment

    The extension includes two risk assessment approaches: quasi-identifiers risks and attacker model risks.

    The quasi-identifiers approach is based on calculation of distinction and separation of the quasi-identifiers and their combinations to find out which attributes have the biggest diversity. Separation defines the degree to which combinations of variables separate the records from each other and distinction defines to which degree the variables make records distinct.

    The attacker model assesses the risk of an attack. There are three attacker types. This approach estimates the probability of re-identification and success rate for each of them.

    1. Prosecutor: tries to identify a specific person in the dataset.
    2. Journalist: tries to identify any person in the dataset, to show that the dataset is compromised.
    3. Marketer: tries to identify as many people in the data set as possible.

    For additional details on risk analysis refer to ARX web site.

    Football stars and the example workflow

    Now let’s get back to the FIFA19 dataset we said we’d use in our example workflow. Our aim is that the output from the workflow will provide a dataset that cannot re-identify any of the players. A risk assessment is performed to make sure that the players cannot be re-identified based on the two approaches, quasi-identifier attributes and risks of attacks.

    Data anonymization in KNIME
    Fig. 1. Workflow overview

    The FIFA19 data set contains 88 columns. We will reduce this number for simplicity’s sake. In the “Pre-processing” component we filter the columns to leave only: Name, Age, Club, Value, Wage, Height, Weight, Release Clause. The next step involves conversion from strings to numbers and deleting rows with missing values.

    In the next component we select the clubs with the highest average Release Clause. This component has a Configuration node inside enabling the user to choose how many clubs should be taken into consideration (the default is 50). Next, the Visualization component creates three distribution plots of the quasi-identifying attributes, which we will anonymize later. It is good practice to visualize the data with histograms, bar charts and sunburst diagrams in order to understand how homogeneous your data is: are there any potential clusters or outliers, for example? This is extremely helpful for building the anonymization hierarchy.

    Anonymization node

    The Anonymization node is the first one we’ll use to anonymize the names of the football players. It utilizes simple technique - hashing; but we can also apply salting (here: fixed seed) to make the anonymization more secure. An added benefit of this approach is that it enables you to get back to the original data since the translation table is available at the second output port.

    Once we have hashed the identifying attributes, we can move on to more sophisticated anonymization methods.

    Data anonymization in KNIME
    Fig. 2. Settings of the anonymization node. The columns that will be hashed should be selected, and one of four available salting modes set up

    Building hierarchies

    The idea of building a hierarchy is to define complex binning rules with multiple layers that go from original data (i.e. the unmodified data) to less and less accurate, and finally to completely suppressed data. There are four types of hierarchies in ARX:

    1. Interval-based hierarchies: for variables with a ratio scale.
    2. Order-based hierarchies: for variables with an ordinal scale.
    3. Masking-based hierarchies: this general-purpose mechanism allows creating hierarchies for a broad spectrum of attributes, by simply replacing the characters with “*”.
    4. Date-based hierarchies: for time series data.

    In this walkthrough, we will also restrict the number of used hierarchies and use only the first two types. An order-based hierarchy is used when generalizing categorical data. We are going to use it to generalize the clubs (figure 3). First, we need to order the clubs manually: at first we take the three outlier clubs which are the only representatives of their country, then four Portuguese clubs, then bigger sets of French, English, Spanish, German and Italian clubs. At the first level of the hierarchy we merge the clubs by country, at the second level we are merging outliers with Portuguese clubs and German clubs with Italian ones. At the higher levels we continue merging the clubs more and more. At the final layer of the hierarchy the information will be completely suppressed (all values will be replaced by “*”) by default. In order to define the size of the set, click a group and define its size. To add the next hierarchy level right click it and click “Add New Level”, then define the size of the next level and so on.

    Data anonymization in KNIME
    Fig. 3. The general settings of the Create Hierarchy node. Select the column and appropriate type of hierarchy for it
    Data anonymization in KNIME
    Fig. 4. Creating an order-based hierarchy for the football clubs

    Preparing the interval-based hierarchy is a bit more complicated. First you need to define the general range of the number within which more detailed ranging will be performed . Do this by clicking the “Range” tab and setting up the values for “Bottom coding from” and “Top coding from”. For simplicity we are going to set up the same values as snap values for both the upper and lower bounds. Snap settings are used in case values fall into an interval stretching from the bottom coding or top coding limit to the "snap" limit, it will be extended to the bottom or top coding limit. All values outside the general interval will always be considered outliers and are put into two special bins: more than higher limit and less than lower limit.

    Now you have to double-click the only interval that is available at the beginning, and set up Min and Max values for it. This will be the smallest bin size. Adding other levels of interval-based hierarchy is similar to the previous example - add the level and define its size.

    Data anonymization in KNIME
    Fig. 5. Creating an interval-based hierarchy for value of the player

    Next node that we are going to use is “Read Hierarchy” - this node is used for reading hierarchy files that were created before and update them according to the current dataset. This is a requirement of ARX algorithms: even if a new dataset has the same structure (column names and data types) it can still have different ranges of values, which is why it should be updated.

    Data anonymization in KNIME
    Fig. 6. The Read Hierarchy node settings

    The settings of the node are pretty straightforward - select the column that is going to be fetched by hierarchy and provide a path to a hierarchy file. The node is capable of reading multiple hierarchies at a time.

    Hierarchical anonymization

    Now let’s finally apply Hierarchical Anonymization. To do this we need to feed the node data table and hierarchy configuration. At the first “Columns” tab you need to specify the attribute types. By default they are always identifiers. Once you change the attribute to quasi-identifying the dialog window automatically changes and asks you for more settings.

    The most important are hierarchy, mode, and weight. If hierarchy is already provided (via blue port) the attribute will be marked by a red asterisk to the right of its name. It is also possible to provide a path to the hierarchy file.

    There are three modes available for data anonymization: generalization, microaggregation and clustering, and microaggregation. The default mode is generalization and hierarchy is only required for it, however for some attributes we are going to use microaggregation. For the latter mode it is necessary to select the aggregation function.

    The weights define the importance of the attributes, which means that the algorithm will try to suppress and generalize the attributes less with higher weights. Default values for every quasi-identifying attribute is 0.5.

    Once all attributes types are defined, and the modes and weights set up, it is time to select an anonymization model. Do that by switching to the next tab - “Privacy Models”. As we said before, we want to use k-anonymity model, with k=4. Basically it means that after anonymization, the highest probability of re-identification of any record will be 1/k=¼=25%. It is also possible to use several different types of models at a time.

    The next tab called “Anonymization Configuration” contains general settings, let’s go through some of them.

    • Partitioning - this option allows us to split the dataset into several partitions. Each dataset is then anonymized independently using the same settings as a new thread. “Partitioning by column” means you split the dataset by the values of the column (e.g. gender, family status) After that all results will be concatenated into one. Users should be careful with this mode as although it can increase anonymization performance, the final result might not satisfy the requirements of the anonymization model. It is better to use it only when you are going to apply the same anonymization settings to different subsets, and you have some columns to distinguish them, for example by gender.
    • Suppression limit - defines the ratio of records that can be completely suppressed during anonymization.
    • Add Class column to output table - if active adds a column with a number of equivalence class of every record.
    • Omit Identifying columns - after anonymization, columns marked as identifying area excluded from the result table.
    • Omit suppressed records - if any records (rows) were completely suppressed they will have only “*” for every quasi-identifying attribute - these records are excluded from the result table.
    • Heuristic Search Enabled - this is a stop criteria for an algorithm that is defined by the number of iterations or amount of time spent before algorithm stops.
    • Generalization/Suppression Factor - a value that defines the preference during data transformation: 0 stands for generalization, 1 for suppression.
    Data anonymization in KNIME
    Fig. 7. An overview of the Hierarchical Anonymization node settings. By default all columns are labeled to be identifying. If users changes type to quasi-identifying, the interface will be automatically changed and user will be asked to provide a hierarchy (if not provided) and select transformation type
    Data anonymization in KNIME
    Fig. 8. Privacy model dialog with k-anonymity model settings
    Data anonymization in KNIME
    Fig. 9. Anonymization Config tab overview of the Anonymization node
    Data anonymization in KNIME
    Fig. 10. Output of Hierarchical Anonymization node. Take a look at the last column called “Class” - this is the equivalence class of k-anonymity model. It is easy to see that the records that belong to the same class have identical values for quasi-identifying attributes - this way they are indistinguishable from other records of the same class. This means that even if the attacker has some information about the player it is not possible to identify that player exactly in the dataset

    Risk assessment

    The next node in the workflow is Anonymity Assessment. It has two input ports, one of them is optional so it possible to not just assess the risks, but also compare them for original and anonymized datasets.

    Data anonymization in KNIME
    Fig. 11. The Anonymity Assessment node settings. The quasi-identifying columns should be selected in order to assess the risks. If the second dataset is provided, the same columns are used for both datasets. Re-identification Risk Threshold value is used to estimate the ratio of records that exceed that limit for Prosecutor and Journalist attacker models
    Data anonymization in KNIME
    Data anonymization in KNIME
    Fig. 12. The output tables of the Anonymity Assessment node. The first table shows a comparison between distinction and separation, the second table shows a comparison of the three attacker models risks

    As we can see the distinction and separation values decreased after anonymization. This table provides insight into the attribute’s significance in terms of person identification. We can also assess how combinations of different quasi-identifying attributes might lead to person re-identification.

    The second table returns the results of risk assessment for three types of attacker models. The most interesting column is “Records at Risk”, showing the percentage of records at risk of being re-identified as per the threshold value. We used the default threshold value - 0.1. After anonymization we can see, that only 0.025 records exceed this risk. A pretty good result.

    Conclusion

    In this blog post we presented an overview of the Redfield Privacy Nodes extension for KNIME which uses different algorithms for anonymization and the assessment of re-identification risks. We implemented hashing with salting technique for reversible anonymization. Then a sophisticated hierarchical anonymization was applied. And finally we assessed the risks before and after anonymization.

    The core technology for the hierarchical anonymization and assessment is based on powerful ARX Java library. ARX is also available as a desktop app - please check it out https://arx.deidentifier.org/downloads/.

     We debated over the length of the blog post and if it should be split into multiple blog posts since there is a lot to absorb. But we think it is important to give a full picture and explain all the tools belonging to the privacy nodes. We would love to hear from you what parts of the blog you would like to hear more about in our future articles. Feel free to contact us. And also check our previous blog post Will They Blend: KNIME Meets OrientDB, about KNIME and OrientDB integration.

    How to install the Redfield Privacy Nodes

    Go to File -> Install KNIME Extensions

    From the list, expand the KNIME Partner Extensions and select "Redfield Privacy Nodes".

    Redfield Privacy Nodes

    About the authors:

    Redfield Privacy Nodes


    Artem Ryasik has an academic background in life science and has a PhD in biophysics. He works as a data scientist at Redfield. Projects include graph analysis, recommendation engines, time-series analysis and data anonymization. When time permits he develops Knime node extensions like OrientDB and Privacy nodes based on ARX open source software. He also teaches KNIME courses in Nordics.


    Redfield Privacy Nodes


    Jan Lindquist is a data scientist leader at Redfield. He helps customers deploy Knime Server on AWS. He also performs GDPR privacy assessments and standardisation work to improve the data governance through tools like Knime and the privacy extensions.


    About Redfield:

    Redfield is fully focused on providing advanced analytics and business intelligence since 2003. We implement the KNIME analytics platform for our clients and provide training, planning, development, and guidance within this framework. Our technical expertise, advanced processes, and strong commitment enable our customers to achieve acute data-driven insights via superior business intelligence, machine and deep learning. We are based in Stockholm, Sweden.

    The Importance of Community in Data Science

    $
    0
    0
    The Importance of Community in Data SciencepaolotamagThu, 11/21/2019 - 10:00

    Authors: Rosaria Silipo and Paolo Tamagnini (KNIME)

    The Importance of Community in Data Science

    Nobody is an island. Even less so a data scientist. Assembling predictive analytics workflows benefits from help and reviews: on processes and algorithms by data science colleagues; on IT infrastructure to deploy, manage, and monitor the AI-based solutions by IT professionals; on dashboards and reporting features to communicate the final results by data visualization experts; as well as on automatization features for workflow execution by system administrators. It really seems that a data scientist can benefit from a community of experts!

    The need for a community of experts to support the work of a data scientist has ignited a number of forums and blogs where help can be sought online. This is not surprising because data science techniques and tools are constantly evolving, and mainly, it is only the online resources that can keep up the pace. Of course, you can still draw on traditional publications, like books and journals. However, they help in explaining and understanding fundamental concepts rather than asking simple questions that can be answered on the fly.

    It doesn’t matter what the topic is, you’ll always find a forum to post your question and wait for the answer. If you have trouble training a model, head over to Kaggle Forum or Data Science Reddit. If you are coding a particular function in Python or R, you can refer to Stack Overflow to seek help. In most cases, there will actually be no need to post any questions because someone else is likely to have had the same or a similar query, and the answer will be there waiting for you.

    Sometimes, though, for complex topics, threads on a forum might not be enough to get the answer you seek. In these cases, some blogs could provide the full and detailed explanation on that brand new data science practice. On Medium, you can find many known authors freely sharing their knowledge and experience without any constraints posed by the platform owner. If you prefer blogs with moderated content, check out online magazines such as Data Science CentralKDnuggets or KNIME Blog.

    There are also a number of data science platforms out there to easily share your work with others. The most popular example is definitely GitHub, where lots of code and open source tools are shared and constantly updated by many data scientists and developers.

    Despite all of those examples, inspiring data science communities do not need to be online, as you can often connect with other experts offline as well. For instance, you could join free events in your city via Meetup or go to conferences like ODSC or Strata, which take place on different continents several times each year.

    I am sure there are many more examples of data science communities which should be mentioned, but now that we have seen some of them, can you tell what a data scientist actually looks for in all those different platforms?

    To answer this question, we will explore four basic needs data scientists rely on to accomplish their daily work.

    1. Examples to learn from

    Data scientists are constantly updating their skill set: algorithm explanations, advice on techniques, hints on best practices, and most of all, recommendations about the process to follow. What we learn in schools and courses is often the standard data analytics process. However, in real life, many unexpected situations arise, and we need to figure out how to best solve them. This is where help and advice from the community become precious.

    Junior data scientists exploit the community even more to learn. The community is where they hope to find exercises, example datasets, and prepackaged solutions to practice and learn. There are a number of community hubs where junior data scientists can learn more about algorithms and best practices through courses on site, online or even a combination of the two —starting with the dataset repository at UC Irvine, continuing with the datasets and knowledge-award competitions on Kaggle, through to educational online platforms such as Coursera or Udemy. There, junior data scientists can find a variety of datasets, problems and ready-to-use solutions.

    However, blind trust in the community has often been indicated as the problem of the modern web-connected world. Such examples and training exercises must bear some degree of trustworthiness, either from a moderated community — here the moderator is responsible for the quality of the material — or via some kind of review system self-fueled by community members. In the latter, the members of the community evaluate and rate the quality of the training material offered, example by example. Junior data scientists can therefore rely on the previous experience of other data scientists and start from the highest rated workflow to learn new skills. If the forum or dataset repository is not moderated, a review system in place is necessary for orientation.

    1. Blueprints to jump-start the next project

    Example workflows and scripts, however, are not limited to junior data scientists. Seasoned data scientists need them too! More precisely, seasoned data scientists need blueprint workflows or scripts to quickly adapt to their new project. Building everything from scratch for each new project is quite expensive in terms of time and resources. Relying on a repository of close and adaptable prototypes speeds up the proof-of-concept (PoC) phase as well as the implementation of the early prototype.

    As is the case for junior data scientists, seasoned data scientists make use of the data science community, too, to download, discuss and review blueprint applications. Again, rating and reviewing by the community produces a measure for the quality of each single blueprint.

    1. Giving back to the community

    It is actually not true that users are only interested in the free ride — in this case, meaning free solutions. Users have a genuine wish to contribute back to the community with material from their own work. Often, users are more than willing to share and discuss their scripts and workflows with other users in the community. The upload of a solution and the discussion that can ensue have the additional benefit of revealing bugs or improving the data flow, making it more efficient. One mind, as brilliant as it may be, can only achieve to a certain extent. Many minds working together can go much farther!

    This concept reflects the open source approach of many data science projects in recent years: Jupyter NotebookApache SparkApache HadoopKNIMETensorFlow, Scikit-learn and more. Most of those projects developed even faster and more successfully just because they were leveraging the help of community members by providing free and open access to their code.

    Modern data scientists need an easy way to upload and share their example workflows and projects, in addition to, of course, an option to easily download, rate and discuss existing ones already published online. When you offer an easy way for users to share their work, you’d be surprised by the amount of contributions you will receive from community users. If we are talking about code, GitHub is a good example.

    1. A space for discussions

    As we pointed out, the main advantage to an average data scientist for uploading his/her own examples on a public repository — besides, of course, the pride and self-fulfillment of being a generous and active member of the community — exists primarily in the corrections and improvements advised by fellow data scientists.

    Assembling a prototype solution to solve the problem might take a relatively short time. Improving that solution to be faster, scalable and achieve those few additional percentages of accuracy might take longer. More research, study of best practices, and comparison with other people’s work is usually involved, and that takes time with the risk of missing a few important works in the field.

    Therefore, data scientists need an easy way to discuss with other experts within the community to significantly shorten the time for solution improvement and optimization. A community environment to exchange opinions and discuss solutions would serve the purpose. This could take place online on websites like the KNIME Forum or offline at free local meetup events.

    A community data science platform

    These are the four important social features that data scientists rely on while building and improving their data science projects.

    Data scientists could definitely use a project repository interfaced with a social platform to learn the basics of data science, jump-start the work for their current project, discuss best practices and improvements, and last but not least, contribute back to the community with their knowledge and experience.

    Project implementation is often tied to a specific tool. Wouldn’t it be great if every data science tool could offer such a community platform?

    As first published in Data Science Central.

    ---------------------------------------

    • Have you visited our KNIME Hub already? The place to find and collaborate on KNIME workflows and nodes. Try it out as a resource for finding solutions to your data science questions.
    • The image at the top of this article is a tag cloud showing the most active contributors to the KNIME Forum. Thank you to all our community contributors! The tag cloud appears in a slide in Rosaria Silipo's presentation Education and Evangelism - Courses, Meetups, Books, Academia, and more during the Opening Session of KNIME Fall Summit 2019.
    Viewing all 561 articles
    Browse latest View live